Adding Multiple Shipping Methods
Adding multiple shipping methods in WooCommerce helps you offer flexible and customer-friendly delivery options. It enables your store to:
- Serve different customer preferences: Some may want express delivery, while others prefer free standard shipping.
- Serve a wider geographical area: For example, you might offer local pickup in New York, next-day delivery in London, and different shipping for other areas.
- Handle various product types efficiently: Bulky or fragile items may require specialized shipping or courier service. Conversely, for smaller goods, you can add different shipping services.
- Encourage more sales: Offering choices like free shipping or fast delivery at checkout can reduce cart abandonment.
It’s like giving your customers a menu—they can pick what works best for their needs and budget. So, let’s check out how you can set multiple shipping methods using WooCommerce and Shipping Manager.
Multiple Shipping Methods in Shipping Manager
First, go to WooCommerce > Settings and select Shipping. From here, you can set up multiple shipping methods using two different ways to set up a new Zone and configure shipping settings for that zone. Moreover, you can set up multiple shipping methods under one specific Zone.
Multiple Shipping Methods Under One Specific Zone
Let’s go with the second method to dive deeper into multiple shipping method settings.
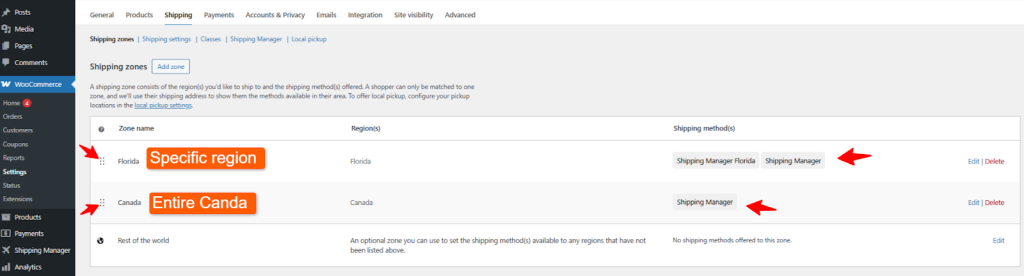
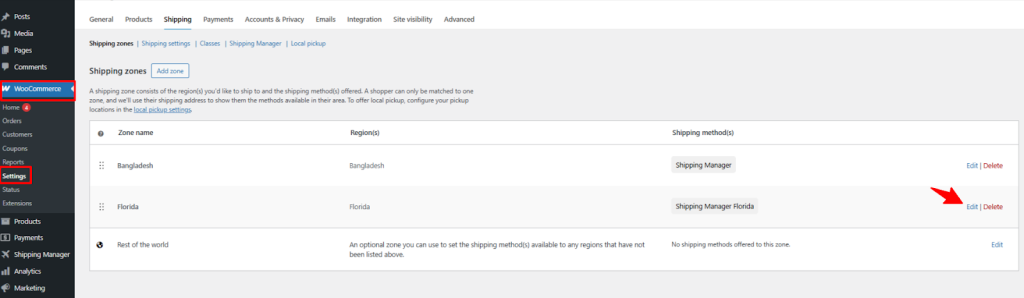
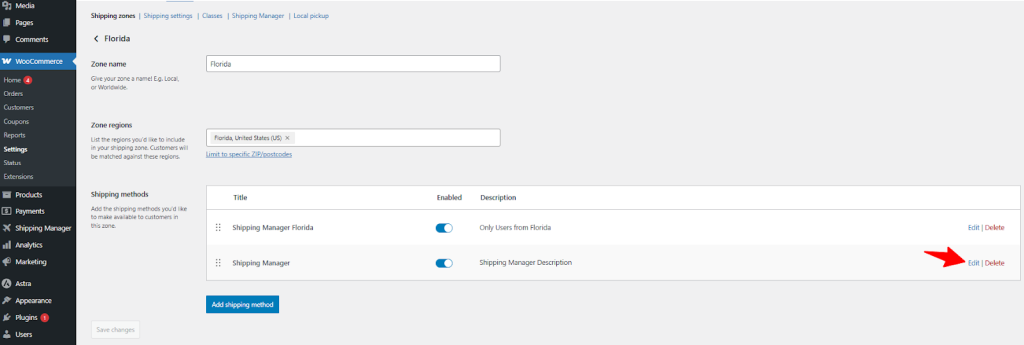
Navigate to WooCommerce > Shipping. As you can see, there are two different shipping Zones. We will add different shipping methods under the Florida Shipping zone. So, click Edit beside the Florida shipping zone.
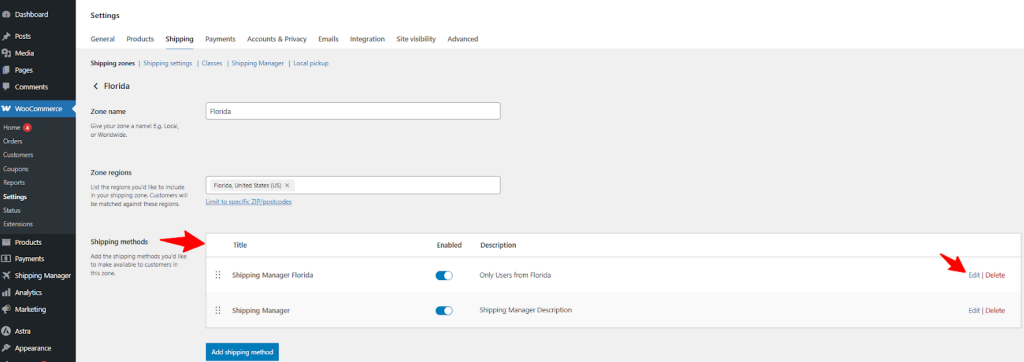
From here, you can add multiple shipping methods. As you can see, a shipping method is already added. To add more methods, simply click the Add shipping method button.

Then, click Shipping Manager from the shipping method list and click Continue

Now you can see there are two different shipping methods. One that was created earlier, named Shipping Manager Florida, and another, which you just created, named Shipping Manager.
Let’s edit one of the shipping methods named Shipping Manager Florida. Click Edit to customize the shipping method.
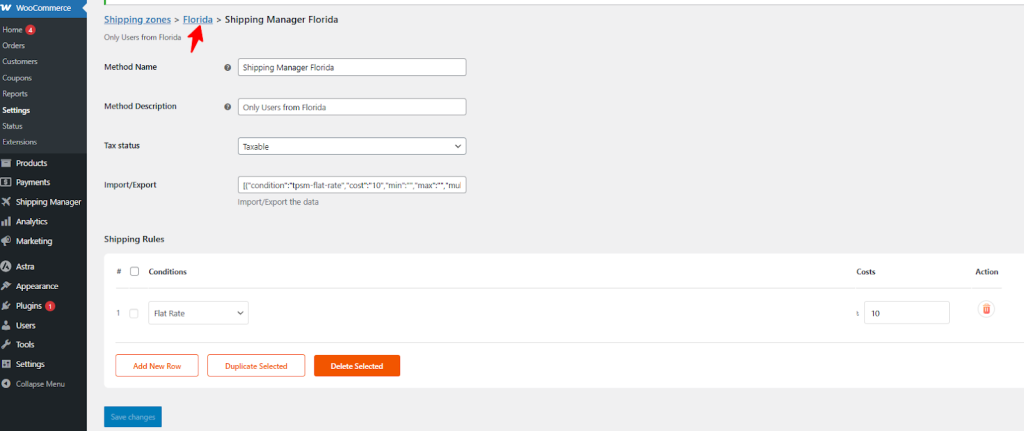
Now you can change the name of this shipping method anytime. From the Shipping Rules, we are selecting Flat Rate and setting the cost as $10. Then click Save Changes.

Then click on the Zone name ( Florida ) to go to that zone-specific shipping method.
Now, click the Edit button beside the second shipping method named Shipping Manager.
This time, select Flat Rate and set the cost as $20, and then click Save Changes.

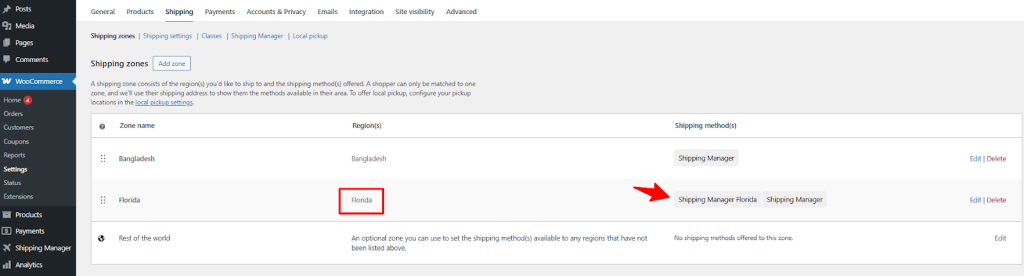
At this point, you’ve set different shipping methods or rules for a specific zone (Florida). Now go back to WooCommerce > Shipping.
For the Florida region, now you can see there are two different shipping methods (Shipping Manager Florida and Shipping Manager ) that you’ve just configured.
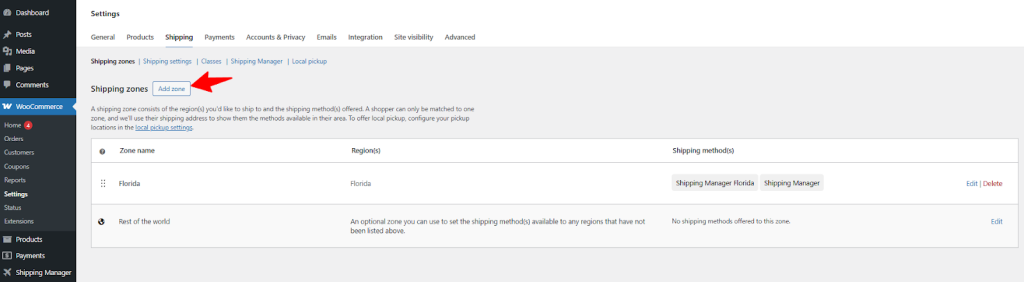
Setting Up Shipping for an Entire Shipping Zone
Let’s create and select an entirely different shipping zone with a different shipping method. Click Add Zone.
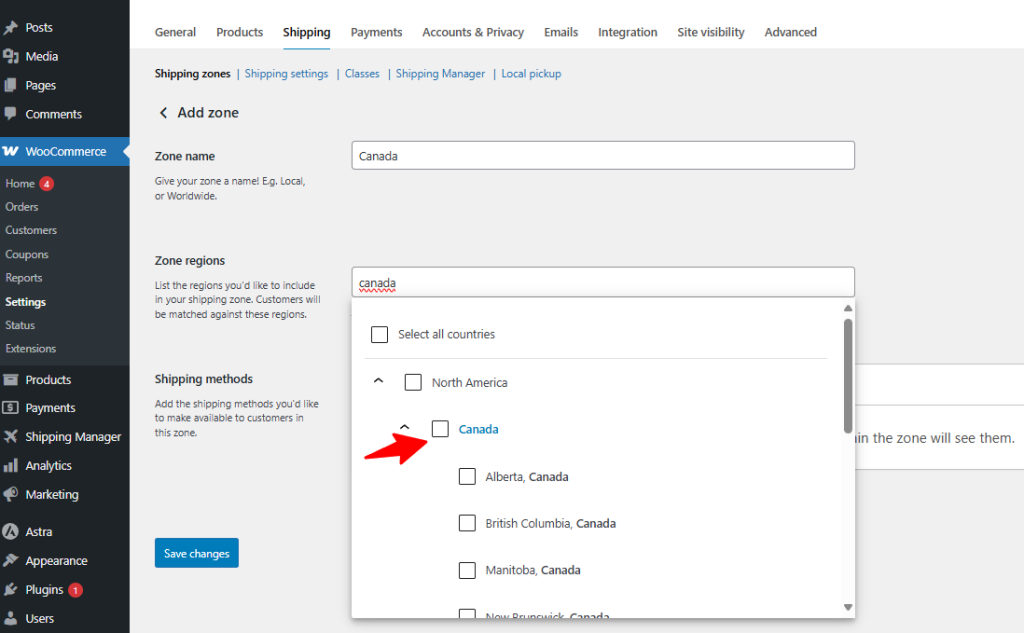
Now, provide the zone name (Canada) and select the entire country (Canada) rather than choosing any specific province.
Then click Add Shipping Method, select Shipping Manager, and click continue.

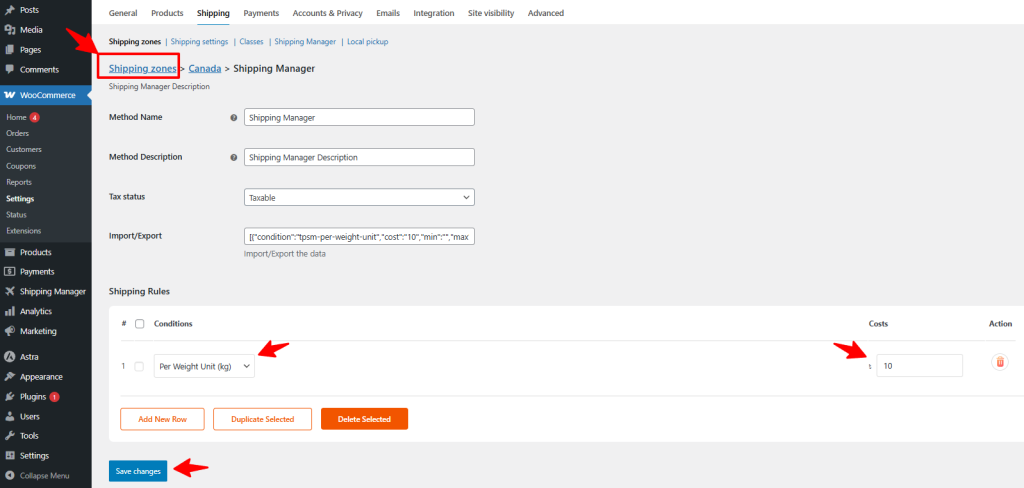
Now, click edit beside the newly created shipping method, named Shipping Manager (This name is editable).

This time, a different shipping rule for this shipping method will be set up and applicable to this entire zone. Now, click on Save changes and then click on Shipping Zones.
As you can see, there are two shipping zones. One of the shipping zones is based on a specific region of the USA, which is Florida. Another shipping method is applicable for the entire Canadian region.