Customizer [ Pro ]
The Customizer feature empowers you to transform the look and feel of your WordPress login and admin pages with advanced styling and layout options. From typography and color schemes to background images and form design, it gives you full creative control—without touching a single line of code.
It’s particularly helpful for:
- Branding client sites with custom logos, fonts, and color palettes
- Designing visually cohesive login experiences that match your theme or business identity
- Creating role-specific admin interfaces for authors, editors, or subscribers
- Enhancing demo environments with polished, professional aesthetics
- Improving user trust and engagement through consistent visual presentation
This feature is ideal for site owners who want to elevate their backend experience and reinforce brand identity. It integrates seamlessly with your workflow, allowing you to deliver a tailored admin interface that feels as refined as the front end.
Here is how you can use this feature:
Enable the Customizer
- First of all, go to Admin Safety Guard > Customizer and enable the button beside Customer.
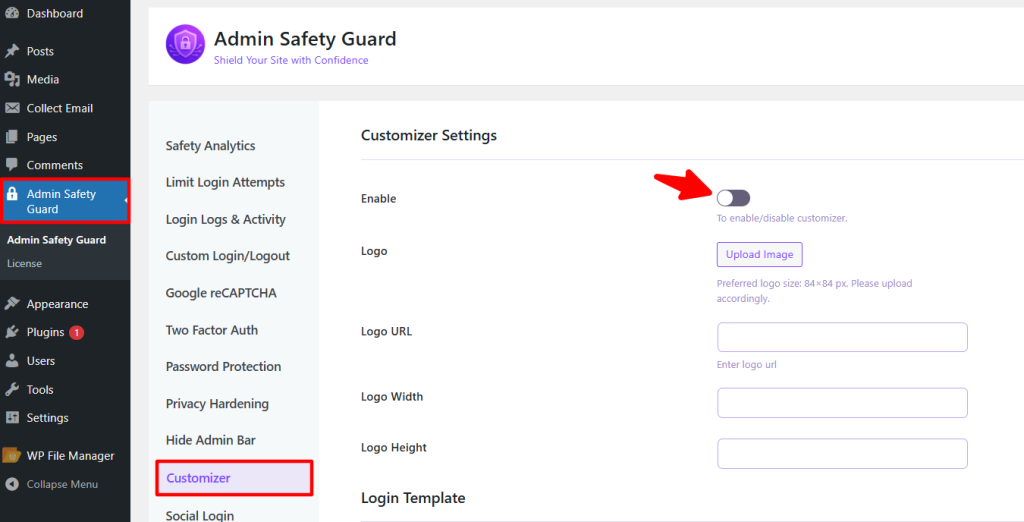
So, you’ve activated the following options in the free plugin:
- Logo
- Logo URL
- Logo Width
- Logo Height
- Login Templates
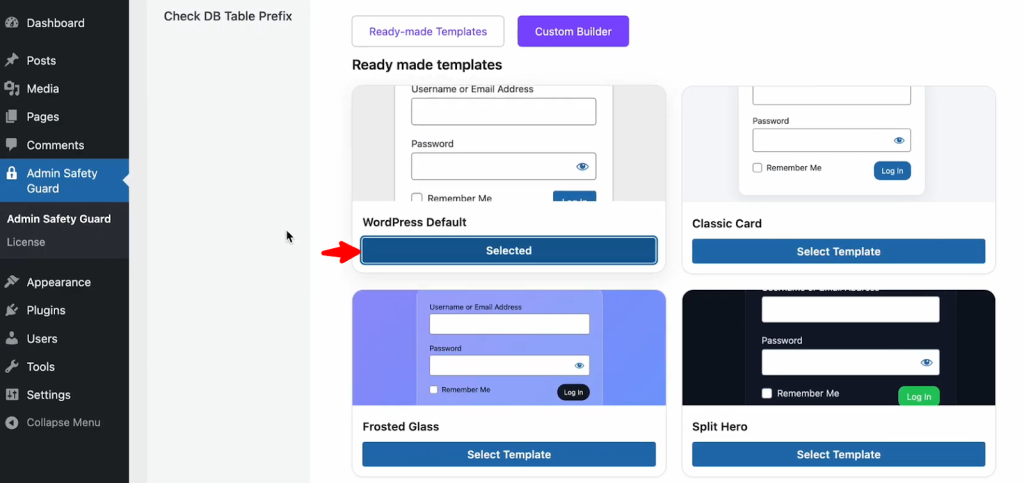
In the pro plugin, you’ll get the Ready-made Templates and Custom Builder, which allows you to select templates for the login page. You can select your preferred design that will be applied to the login page.
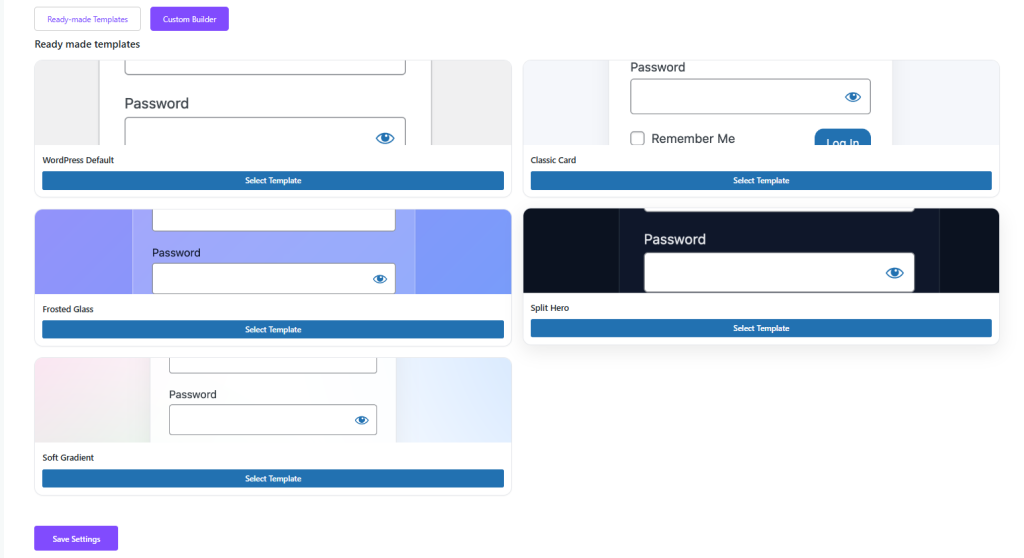
Activating a Template
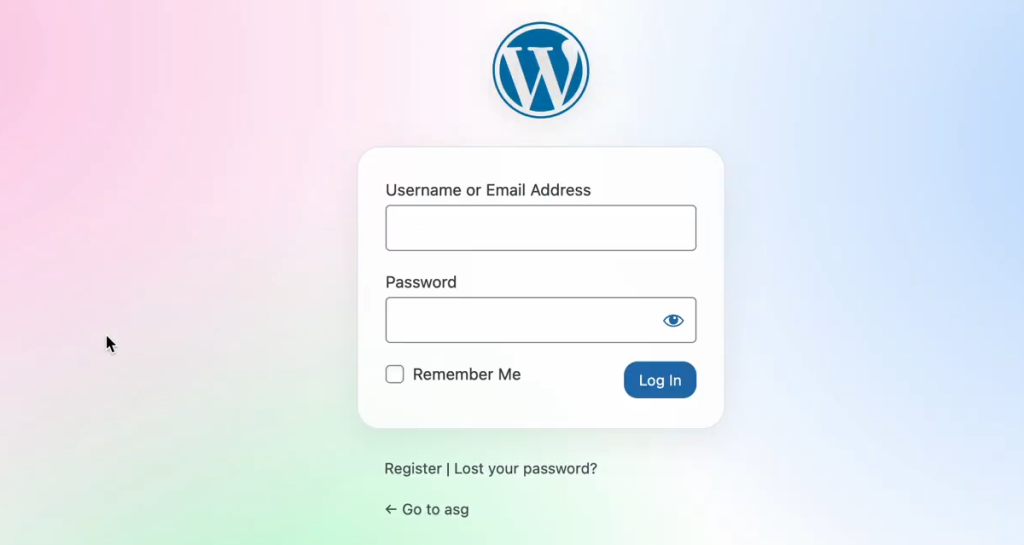
- We’ve selected a template from the list and activated it. Now, click Save Settings

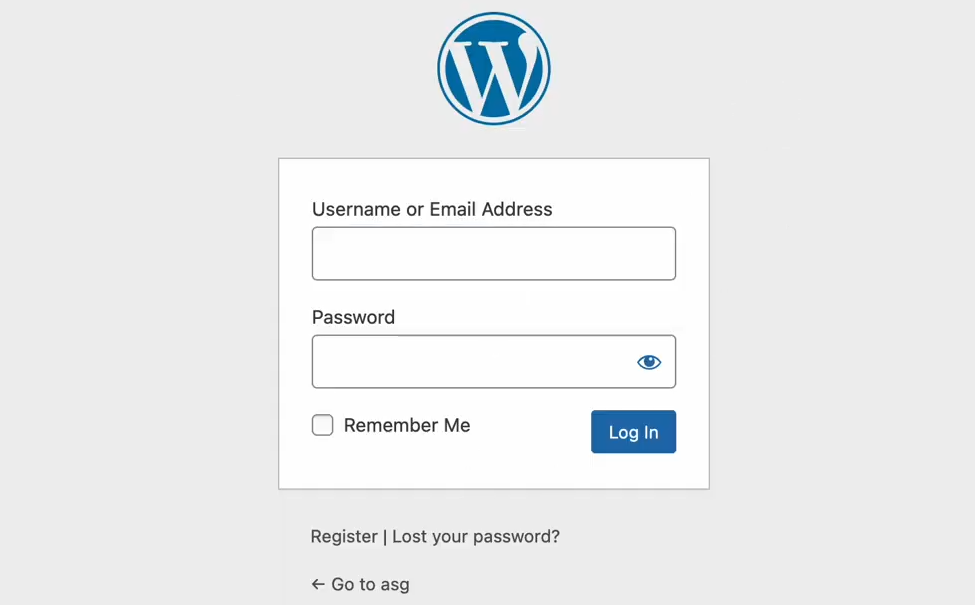
- Then, log out of your website and return to the login page.
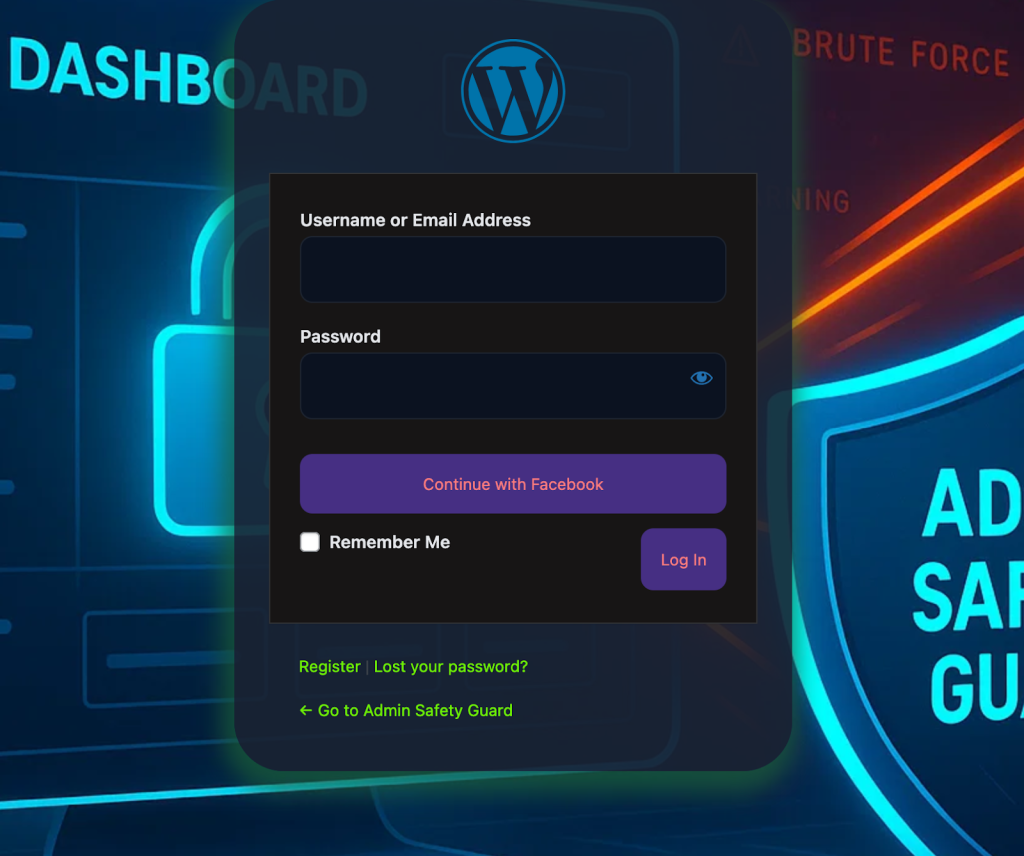
- As you can see, the login page design has been changed to your selected template.
- We then selected the default login page design and clicked Save Settings.
- Then log out and go back to the login page. As you can see, the login page design has changed to the default design.
Using Custom Builder
Let’s explore the custom login page design builder and learn how to use it.
- Click the Custom Builder option.
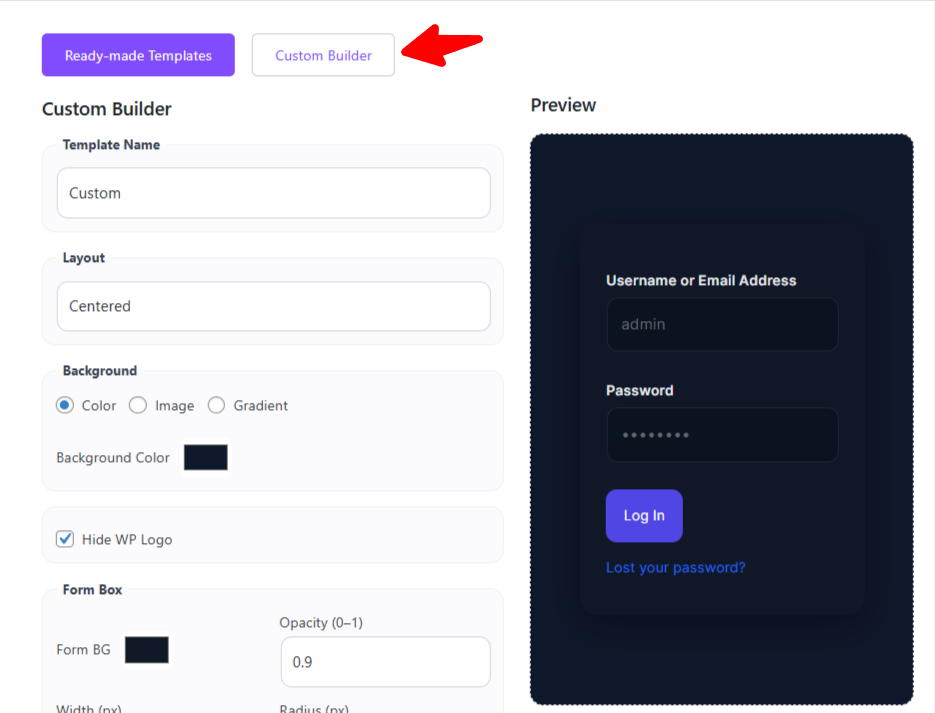
In the custom builder, you will get the following options to change the login area:
- Template Name
- Layout [Center / Left / Right ]
- Background [ Color / Image / Gradient ]
- Hide WP Logo
- Form Box [Opacity/ Width / Radius / Shadow ]
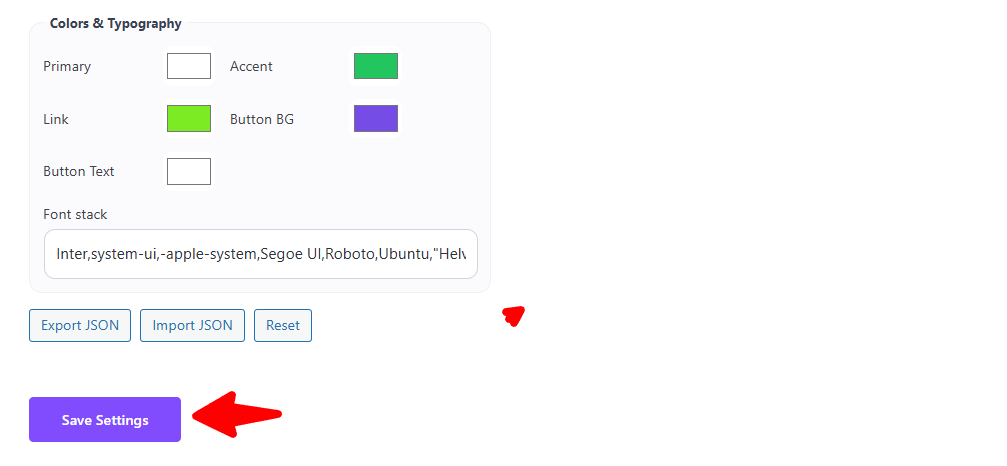
- Colors & Typography [Primary / Accent / Link / Button BG / Button Text]
- Font Stack
- Export Json / Import Json / Reset options
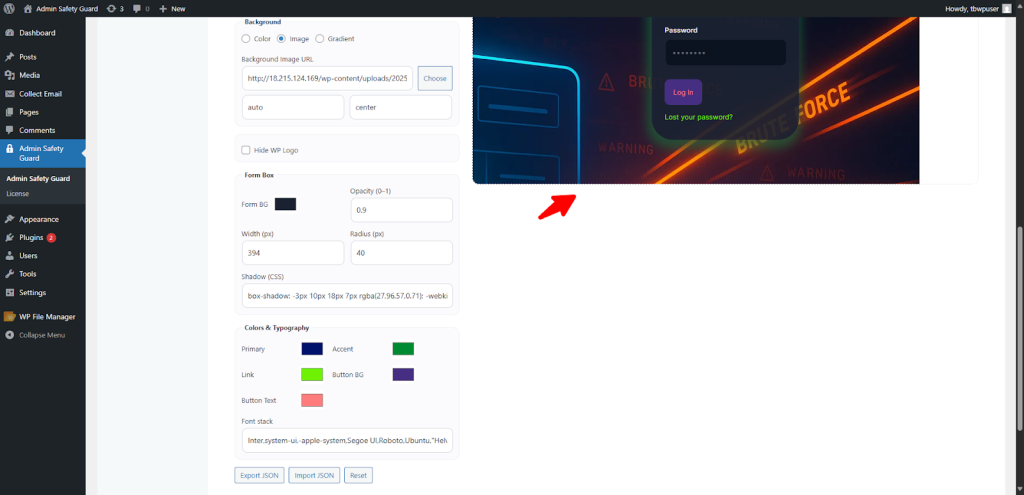
Now we’ve selected the –
- Template Name: Ad Login
- Layout: Split Left
- Background: Selected the Image option and uploaded an image.
- Hide WP Logo: Not selected since we want to show the logo.

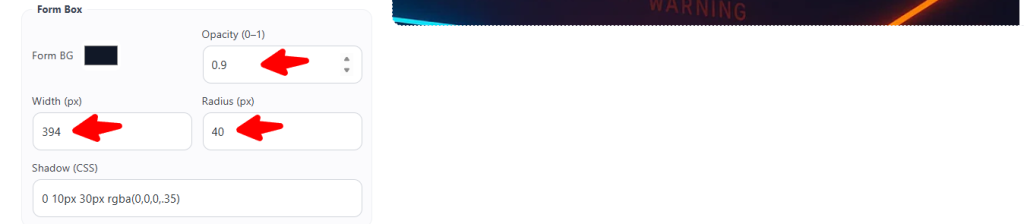
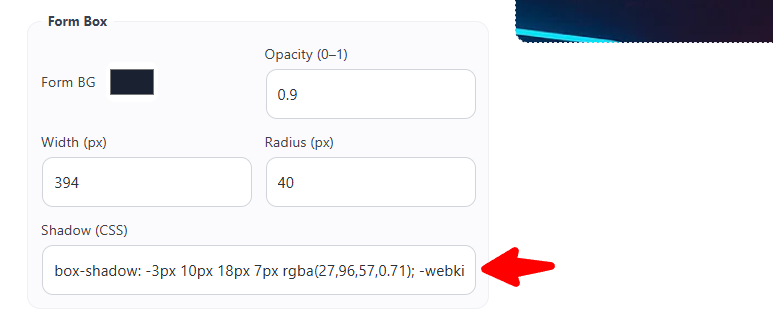
- Form background: Selected a background color from the color picker.
- Opacity: Selected the opacity or transparency of the background as 0.9.
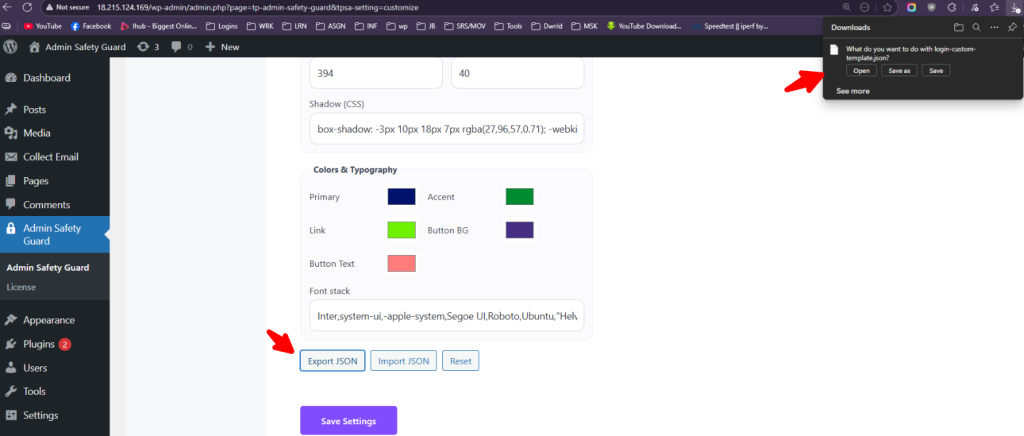
- Width (px): Selected the width as 394 of the form background
- Radius: Selected 40, which is the form radius in all four corners
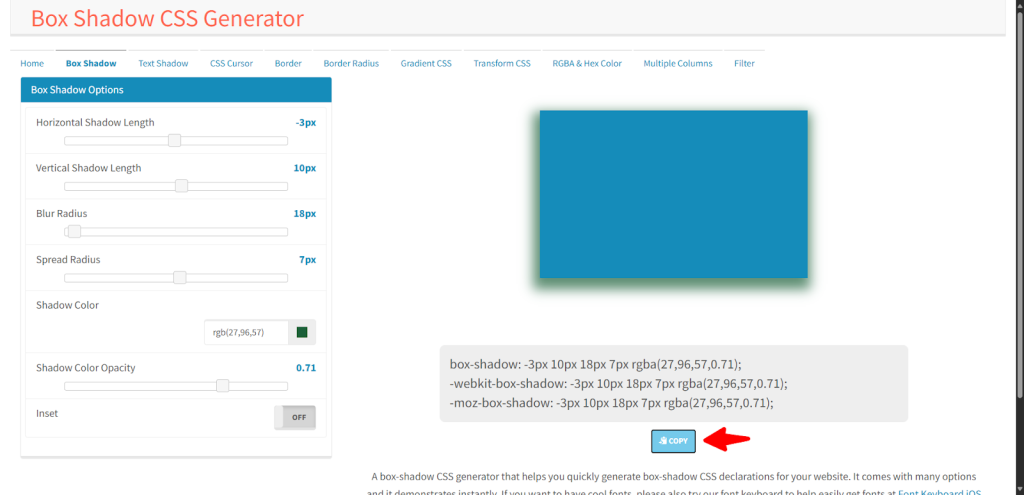
- Shadows: Go to the Box Shadow CSS generator site and configure it as you prefer. Then copy the code and go back to your plugin.
- Now go back to Admin Safety Guard and put the code below the Shadow (CSS)
- Then select your preferred colors & typography from the available options. You can change the colors of the following elements of the form:
- Primary text
- Link color
- Accent color
- Button background color
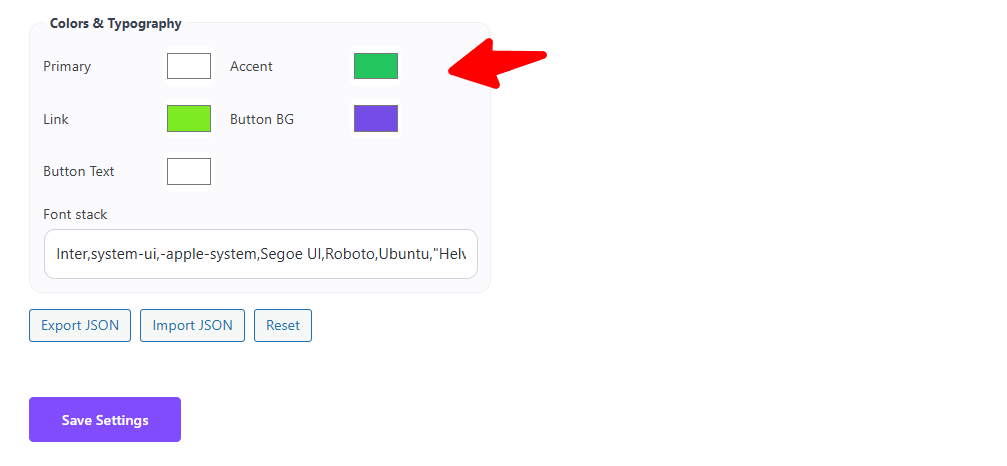
- You should now check the live preview to finalize weather the form looks
- When you are satisfied with the output, click the Save Settings button.
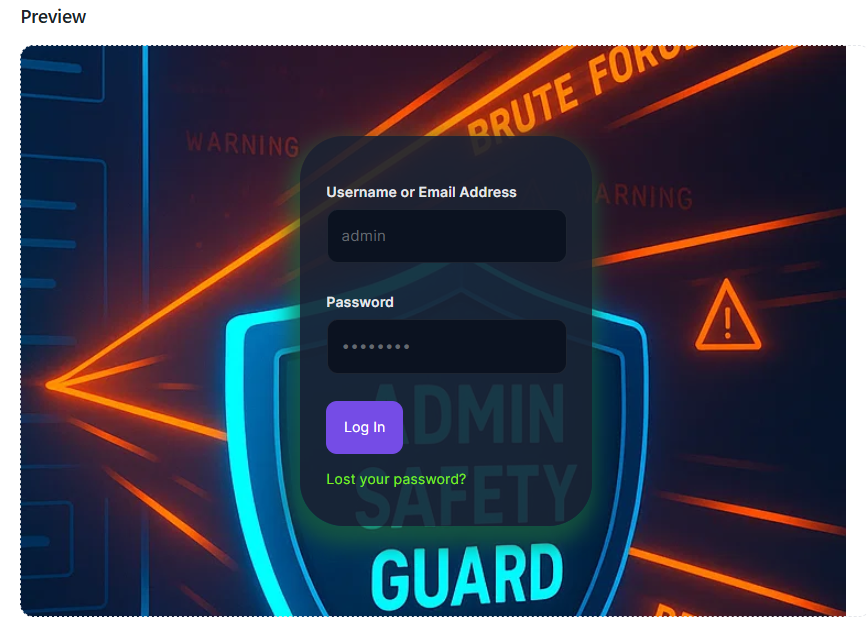
- Now, log out of your website and go to the login page. As you can see, the login page is now looking as we’ve modified it using the customizer option.
- Let’s go back to the Admin Safety Guard and explore the rest of the optios, including:
- Export JSON: Allows you to export your form design’s JSON File
- Import JSON: Let’s you import your created design from the system.
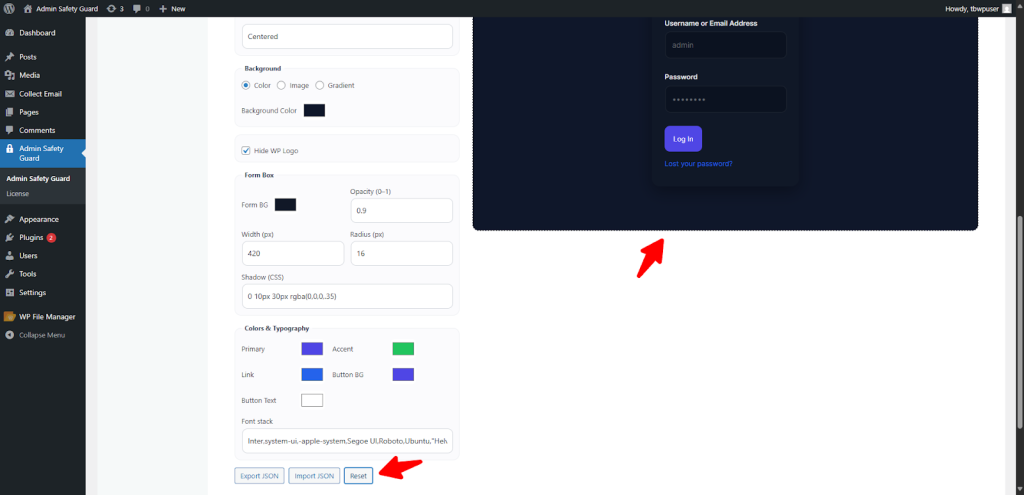
- Rest: Rests the login from design into its default design.
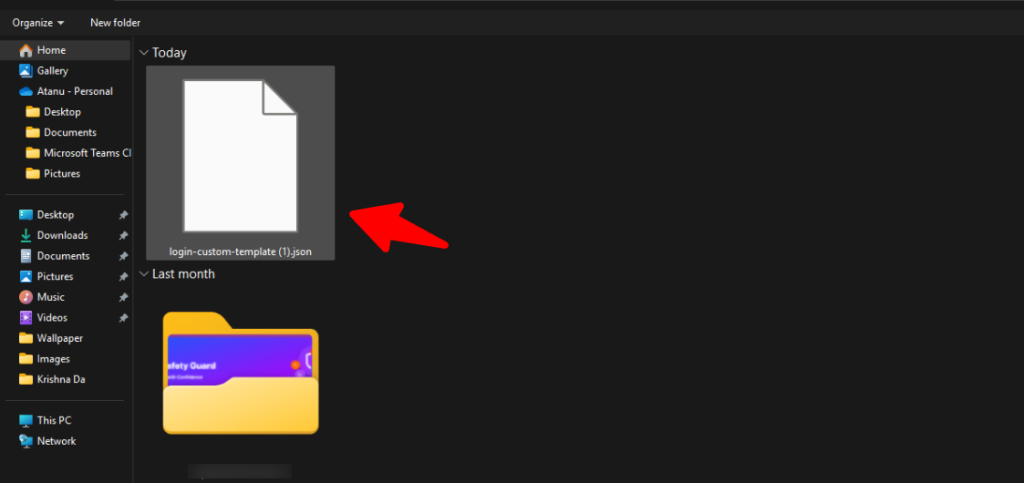
- Click the Export JSON button. This will now download the current deign that you’ve created for your login page. Save the JSON file in your system.
- Now click the Reset button and see the preview. The form design is now changed to its default format.
- Now click the Export button and select the JSON file that you’ve exported previously.
- The Preview shows that the form design is now changed to the design that you’ve exported via the JSON file.