Web Application Firewall [ Pro ]
The Web Application Firewall (WAF) acts as a protective shield between your WordPress site and incoming traffic, filtering out malicious requests before they ever reach your server. It actively monitors and blocks common attack vectors such as SQL injections, cross-site scripting (XSS), brute-force login attempts, and bot-driven exploits in real time.
By stopping threats at the entry point, the WAF prevents attackers from exploiting vulnerabilities in your themes, plugins, or core files. This proactive defense significantly reduces server load, improves site stability, and minimizes the risk of successful breaches—without affecting the experience of legitimate visitors.
It’s particularly helpful for:
- Blocking malicious traffic before it reaches your website
- Preventing common attacks like brute force, SQL injection, and XSS
- Reducing server strain caused by bots and automated attacks
- Protecting login pages, admin areas, and sensitive endpoints
- Maintaining site performance, uptime, and user trust
With the Web Application Firewall enabled, your site gains a strong first line of defense that works continuously in the background. This allows you to focus on running your business, knowing that most attacks are stopped before they can do any harm.
Note: Activate the pro plugin to enable this feature.
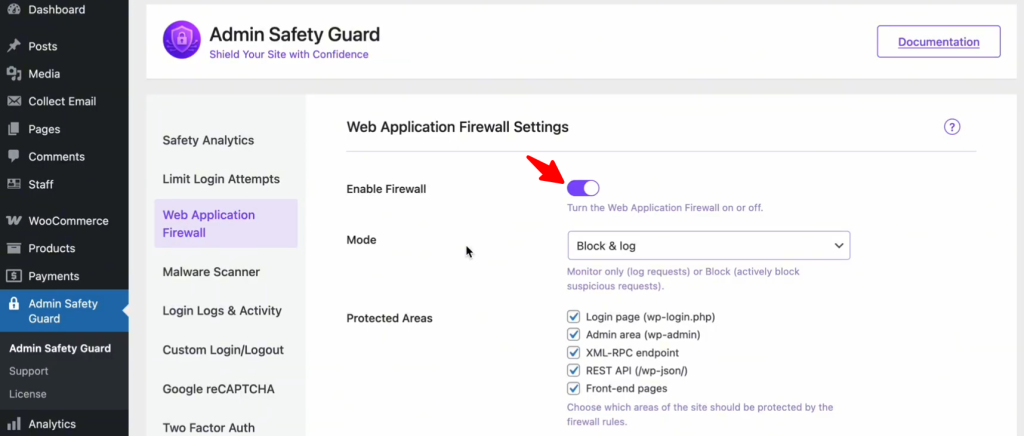
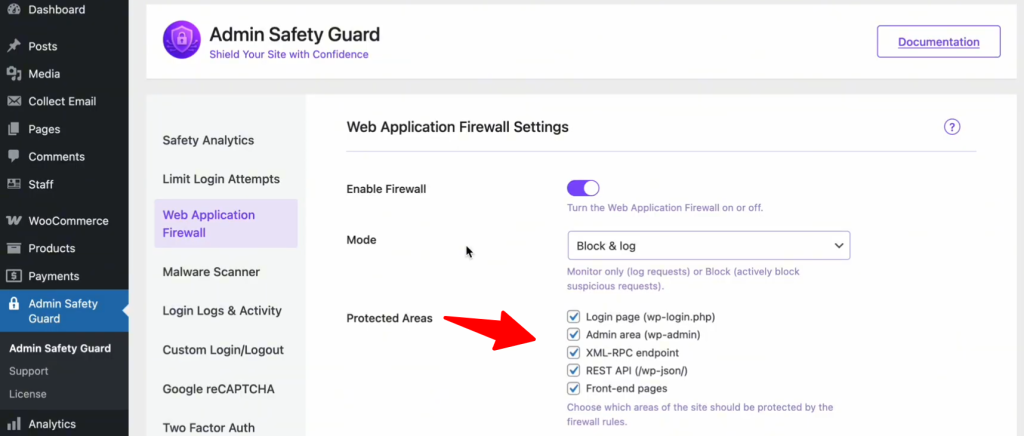
Enable the Web Application Firewall
To enhance our web application’s security, we can utilize a Web Application Firewall, specifically through the Admin Safety Guard. By implementing this WAF, we ensure robust protection against various online threats and vulnerabilities.
- Log in to your website dashboard.
- Navigate to Admin Safety Guard and select the Web Application Firewall section.
- Enable the firewall by clicking the button next to the “Enable Firewall” option.
- Click the Save Settings button
With this firewall, you can monitor user activity on your site, detecting any potentially harmful actions. If malicious behavior is identified, you can then take appropriate measures, such as blocking the user or preventing specific actions. If the actions are deemed safe, the system will allow the user to access your website without interruption.
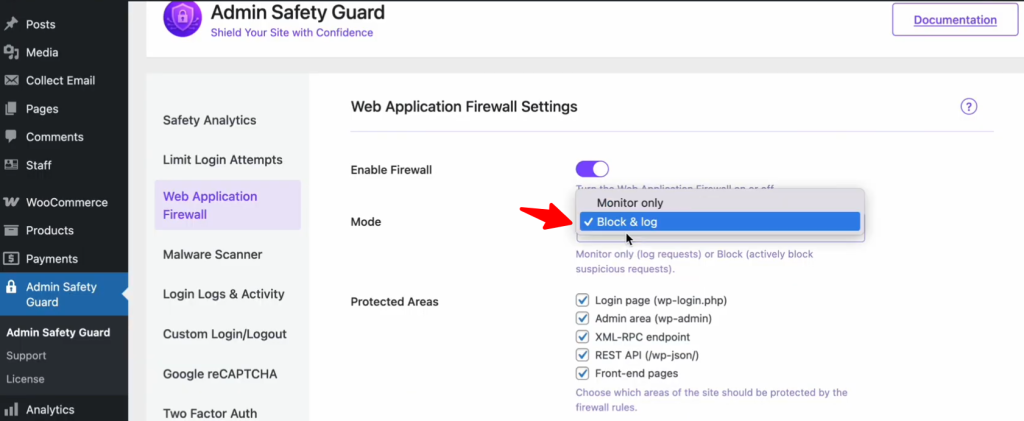
Select the WAF Mode
We can choose the mode based on your monitoring preferences. You can either select:
- Monitor Only: Tracks potential threats without taking any action against them.
- Block & Log: The system will actively block harmful activities and log them for review.
Monitor Only
By choosing this mode, you can monitor various parts of your website, including the login page, admin area, XML-RPC endpoint, REST API (WP JSON), and front-end pages. In this mode, the system only monitors and logs activities without blocking them.
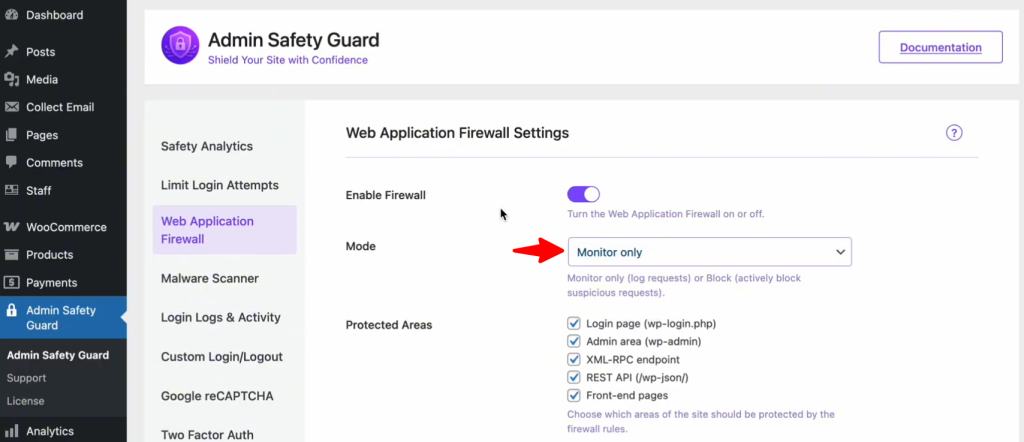
In Monitor Only mode, the system detects harmful actions, such as SQL injection attempts, and logs them. However, it will not block the actions; it will simply monitor and record them for review. Users can still log into the site, but any harmful actions, such as injection attempts, will be detected and logged.
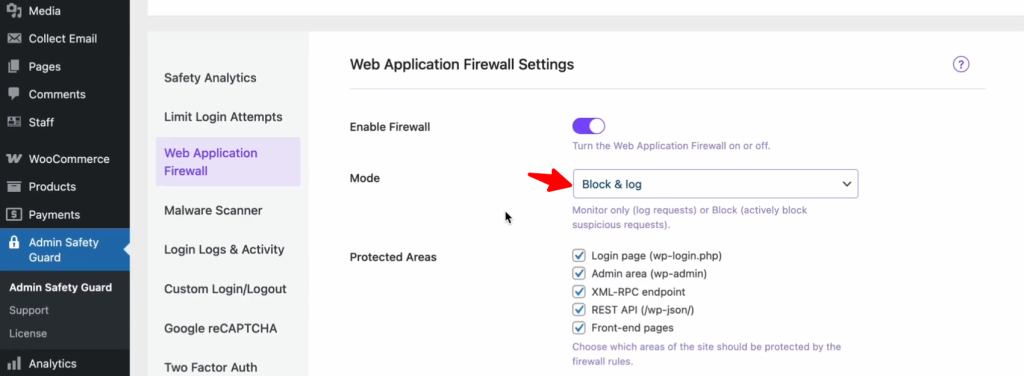
Block and Log
If the system detects a harmful action, such as an SQL injection attempt, it will immediately block the user from that network or IP address. This ensures that the malicious entity cannot access your site at all, providing an added layer of security.
Protect Areas Using WAF
There are certain protected areas or specific pages of your website that are crucial for blocking malicious attacks. The key protected pages include:
- Login Page (wp-login.php): Protects against brute force attacks and unauthorized login attempts.
- Admin Area (wp-admin): Guards against privilege escalation and unauthorized access.
- XML-RPC Endpoint: Blocks malicious requests that could exploit remote procedure calls.
- REST API (/wp-json/): Prevents unauthorized data access and abuse of API endpoints.
- Front-End Pages: Shields against XSS attacks, data scraping, and other malicious activities.
Simply select the resources you want to protect with WAF firewall rules.
Whitelist IP Addresses
We recommend using the whitelist IP address feature in the Web Application Firewall settings. Under these settings, you’ll find the “Whitelist IP Address” option. We strongly advise adding all your admin IP addresses here.
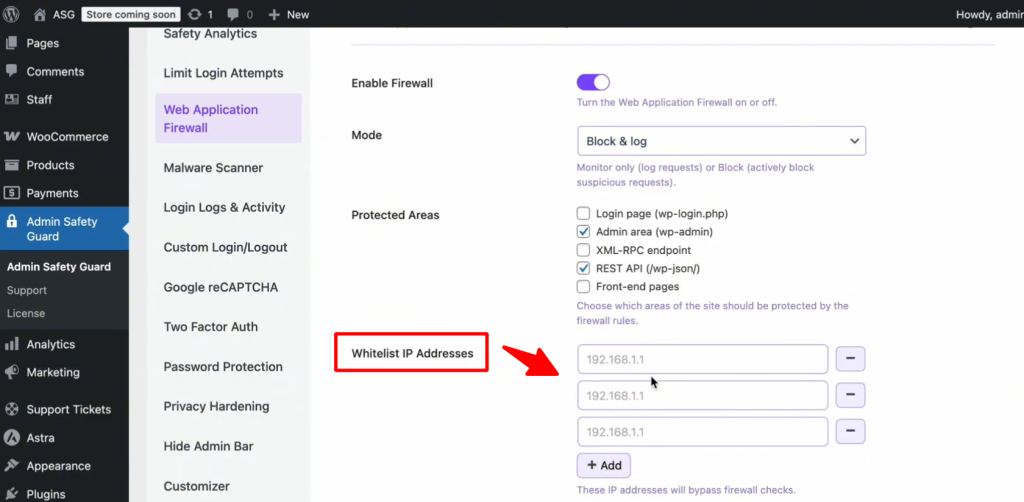
This ensures that Admin Safety Guard won’t accidentally block you. Sometimes, administrative actions can resemble malicious activity, and by whitelisting your IP addresses, you prevent accidental blocks.
Block IP Addresses
With this option, you can block specific IP addresses that pose a threat to your website. Simply enter the IP address you want to block in the designated field and add it to the block list. Once added, the system will automatically prevent that IP address from accessing your site.
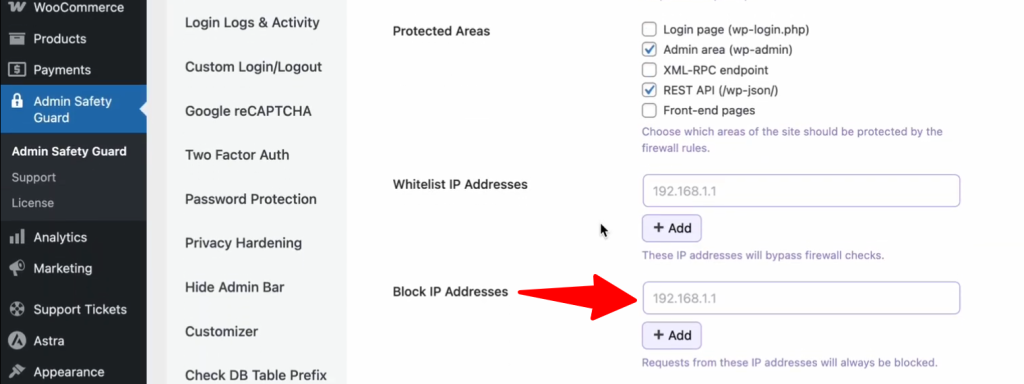
If you notice any malicious activity originating from a specific IP address, you can easily add it to the block list. This ensures that malicious actors are prevented from accessing your site in the future, keeping your site secure.
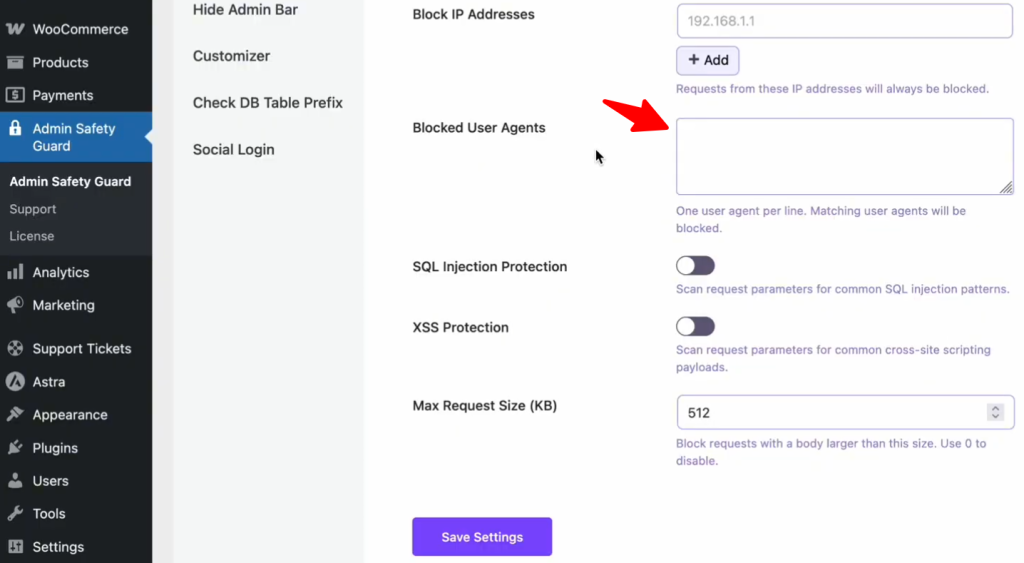
Blocked User Agents
With this option, you can block specific user agents that attempt to access your website. Simply enter one user agent per line in the provided field. Any user agent that matches the ones you’ve entered will be blocked from accessing your site.
For example, if you want to block users accessing your site from a specific browser like Mozilla Firefox, you can simply enter “Mozilla Firefox” in the input box, and users from that browser will be blocked.
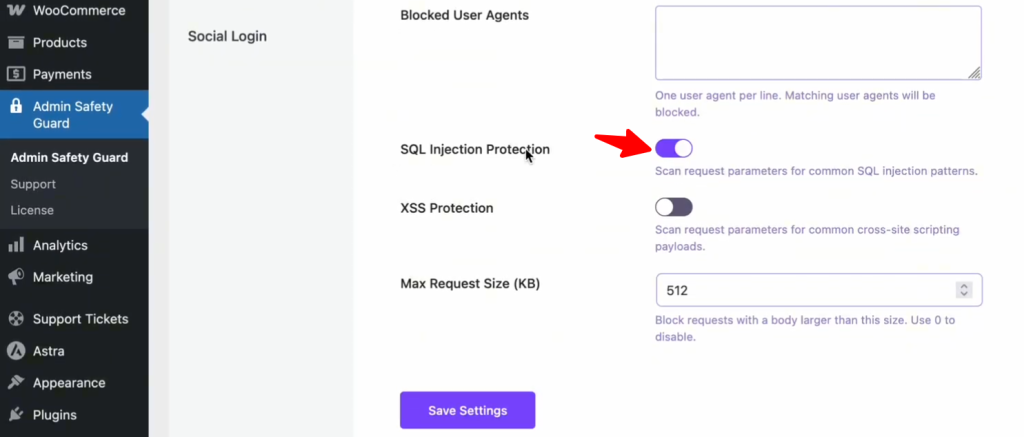
SQL Injection Protection
This section blocks common SQL injection patterns that could potentially compromise your website’s security. By detecting and neutralizing these malicious queries, the firewall ensures that your database remains protected from unauthorized access and data breaches.
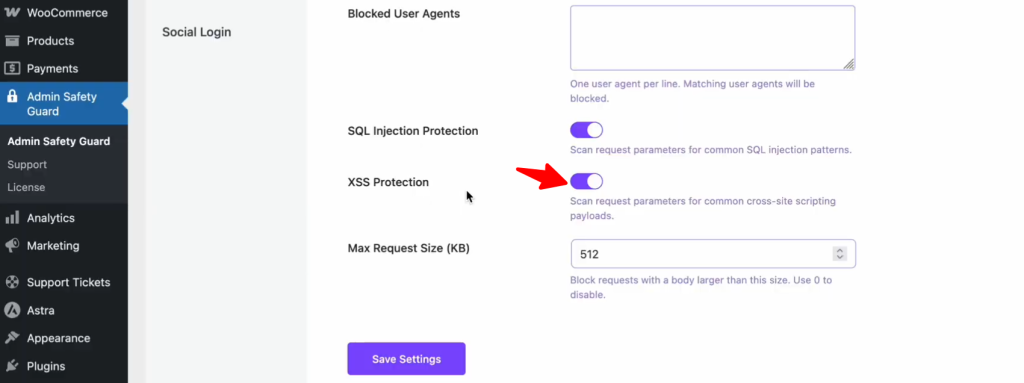
XSS Protection
Enabling this option ensures that cross-site scripting (XSS) attacks are effectively blocked. The firewall scans request parameters for common XSS payloads, preventing malicious scripts from being injected and executed. As a result, your website remains secure from potential XSS vulnerabilities, safeguarding both data and user experience.
Max Request Size
With the maximum request size option, you can block incoming requests whose request bodies exceed the configured size limit. This helps protect your server from potential overload and mitigates risks such as DDoS attacks, in which large volumes of data are sent to overwhelm the server.
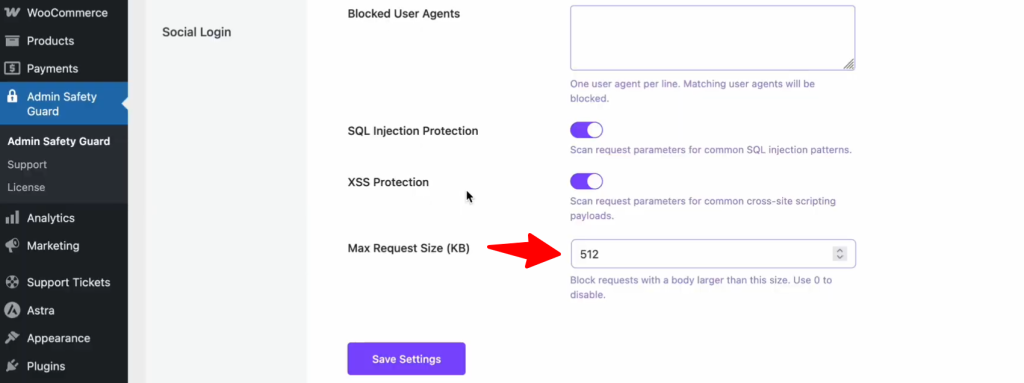
For instance, you can set a limit, such as 512 KB, to block any request exceeding that size. If needed, you can also set the limit to zero to disable this feature. Adjusting this setting allows you to tailor the prot