We use cookies to understand how you use our website and to improve your experience. This includes personalizing content and advertising. To learn more, please click Here. By continuing to use our website, you accept our use of cookies, Privacy policy and terms & conditions.
-
-
-
WordPress Plugins
- Shipping Manager Plugin
- SM Pro Addon
- Admin Safety Guard
-
- Resource
- About
- Contact Us
-
- Login
- Register
Installing Shipping Manager Plugin [Free Version]
Overview: This documentation will show you how to install the Shipping Manager plugin on your WordPress site easily.
Shipping Manager offers two versions:
SM Pro Addon (Premium Version)
Prerequisites
WordPress
WooCommerce
Shipping Manager Plugin
Note: Ensure you are using the latest version of your WordPress site and the WooCommerce plugin. Otherwise, update your core WordPress version and the WooCommerce plugin.
Installing and Activating Shipping Manager (Dashboard)
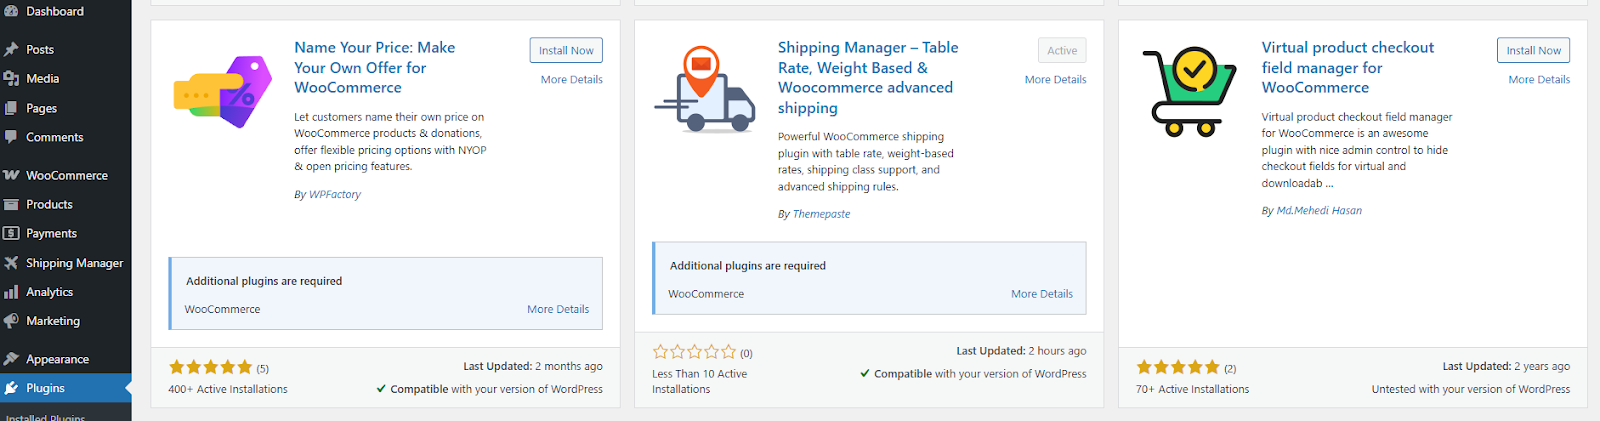
First, log in to your WordPress site’s admin dashboard. Go to Plugins → Add New. Now, type Shipping Manager in the search bar.
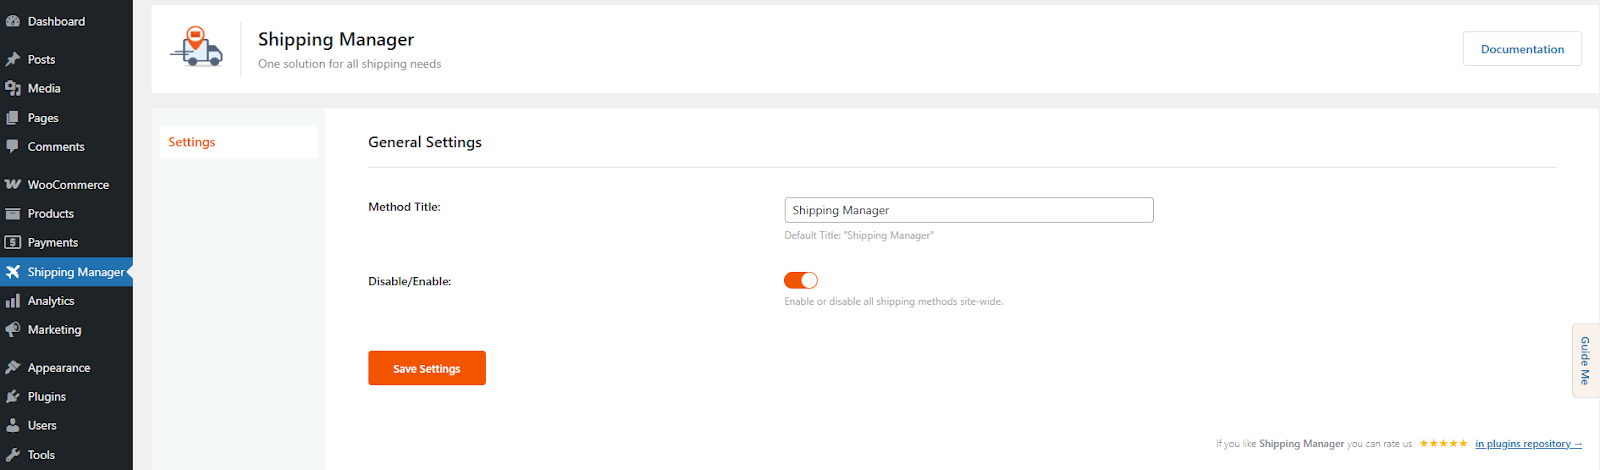
Now, click Install & Activate and view the plugin on the left-hand side of the dashboard panel. This is the dashboard UI of shipping manager but rest of the settings will be available under WooCommerce > Settings > Shipping once you install WooCommerce.
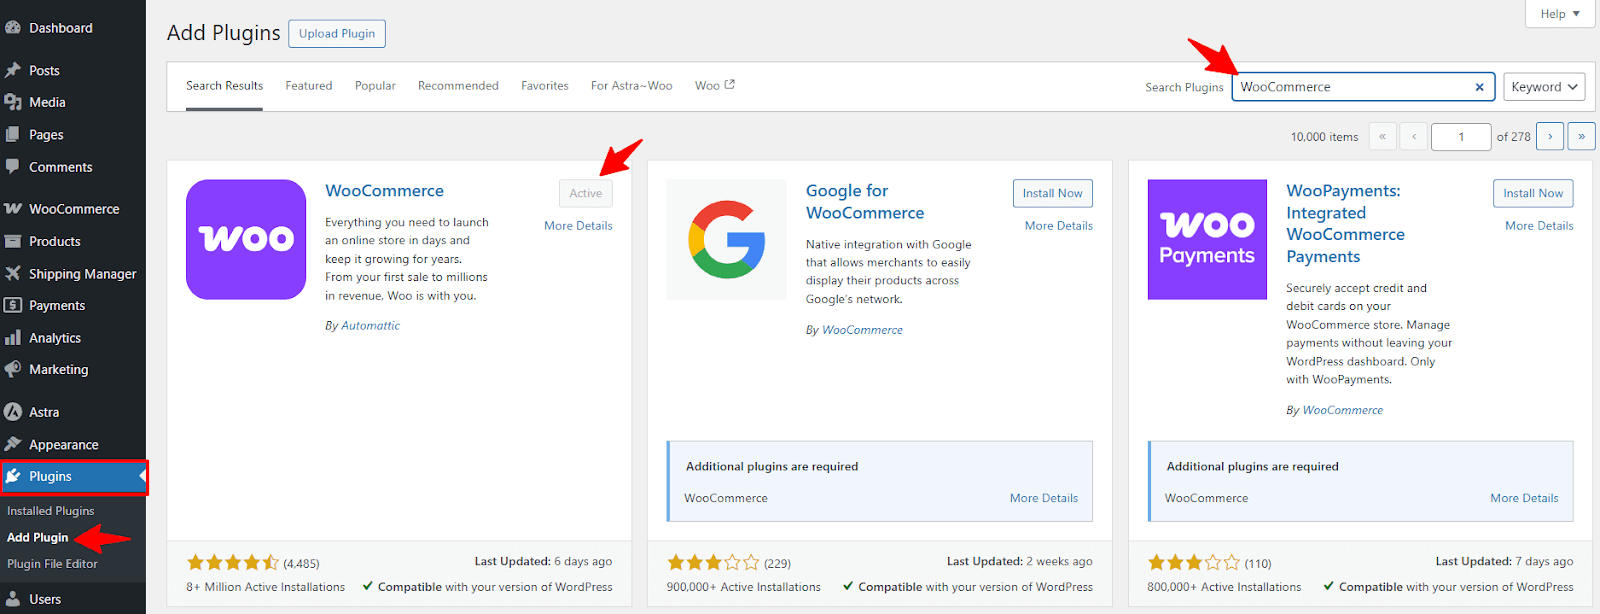
Next, you need WooCommerce to make the Shipping Manager plugin functional. So, navigate to Plugin > Add Plugin. Then search for WooCommerce, click Install, and Activate the plugin.
Note: Learn more about how to configure WooCommerce from their documentation section.
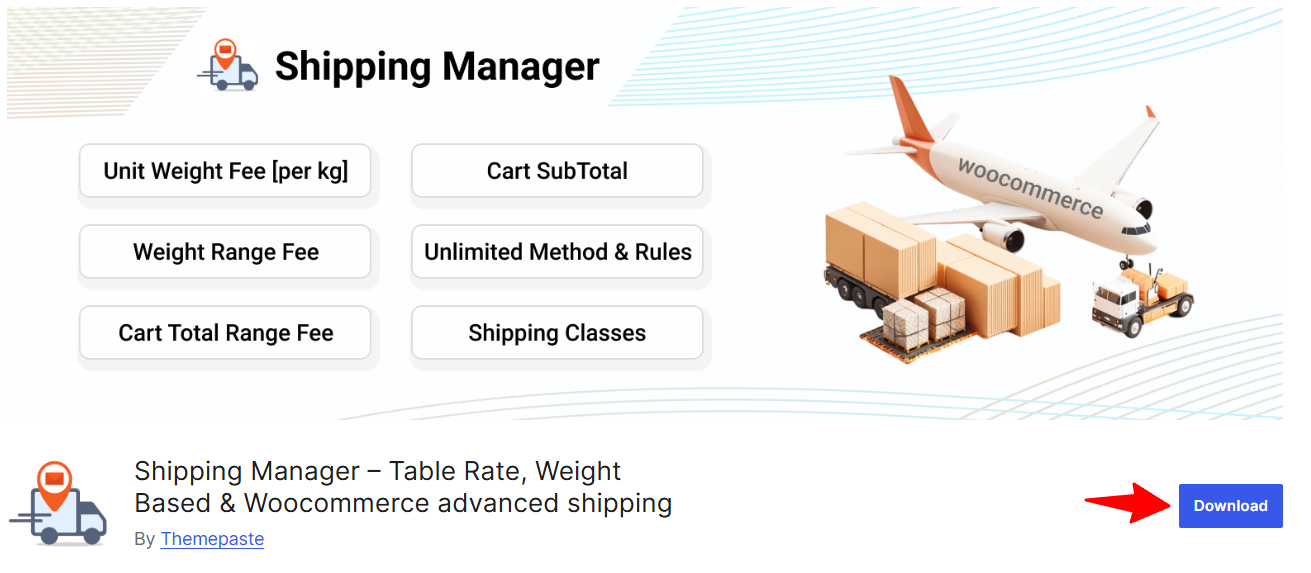
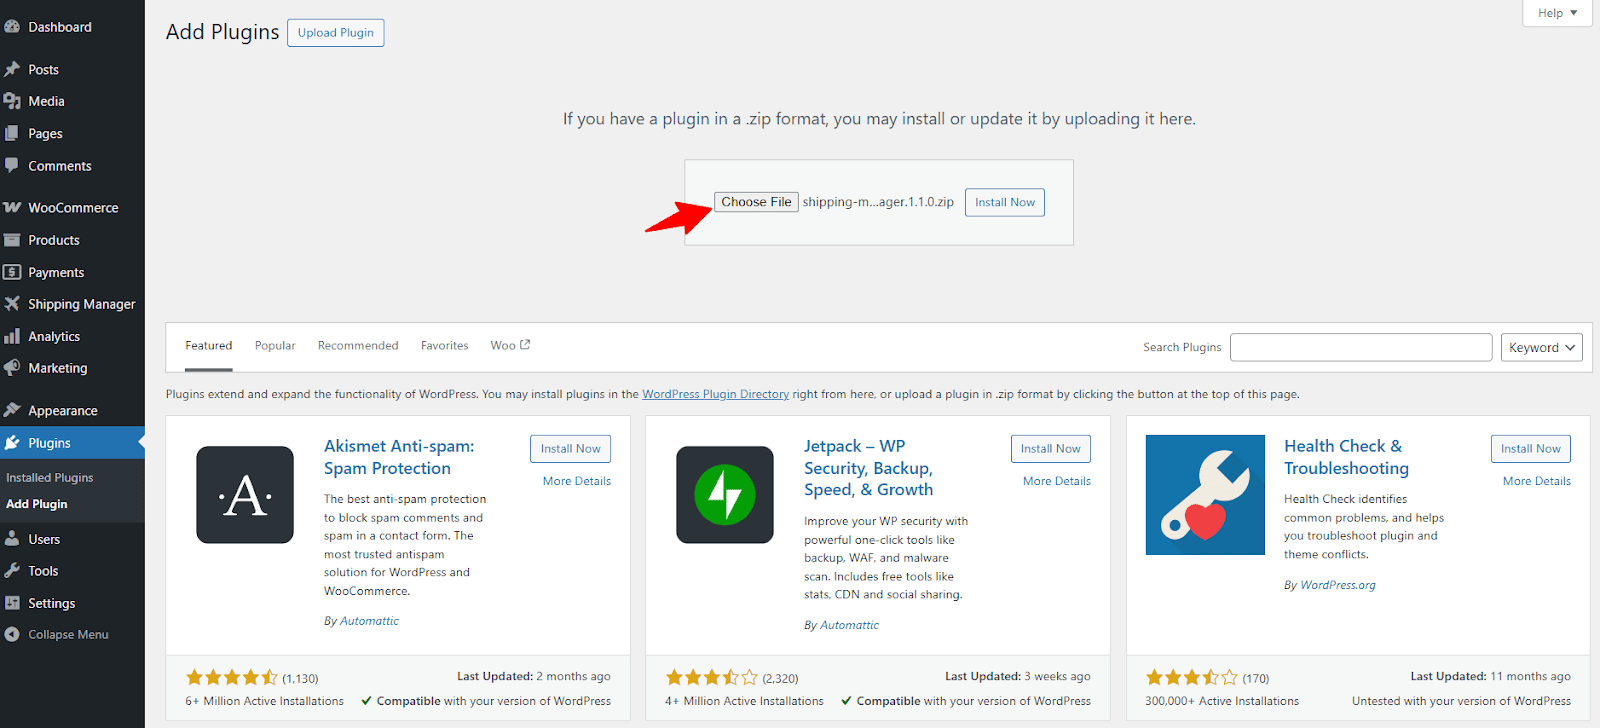
However, you can also install the Shipping Manager plugin after downloading the ZIP file. The ZIP file is also available on WordPress.org, where you can download it.
Now go to Plugins > Add Plugin. Then, click the Choose File button and upload the ZIP file you downloaded. Then click the Install Now button and wait until the installation process is completed.
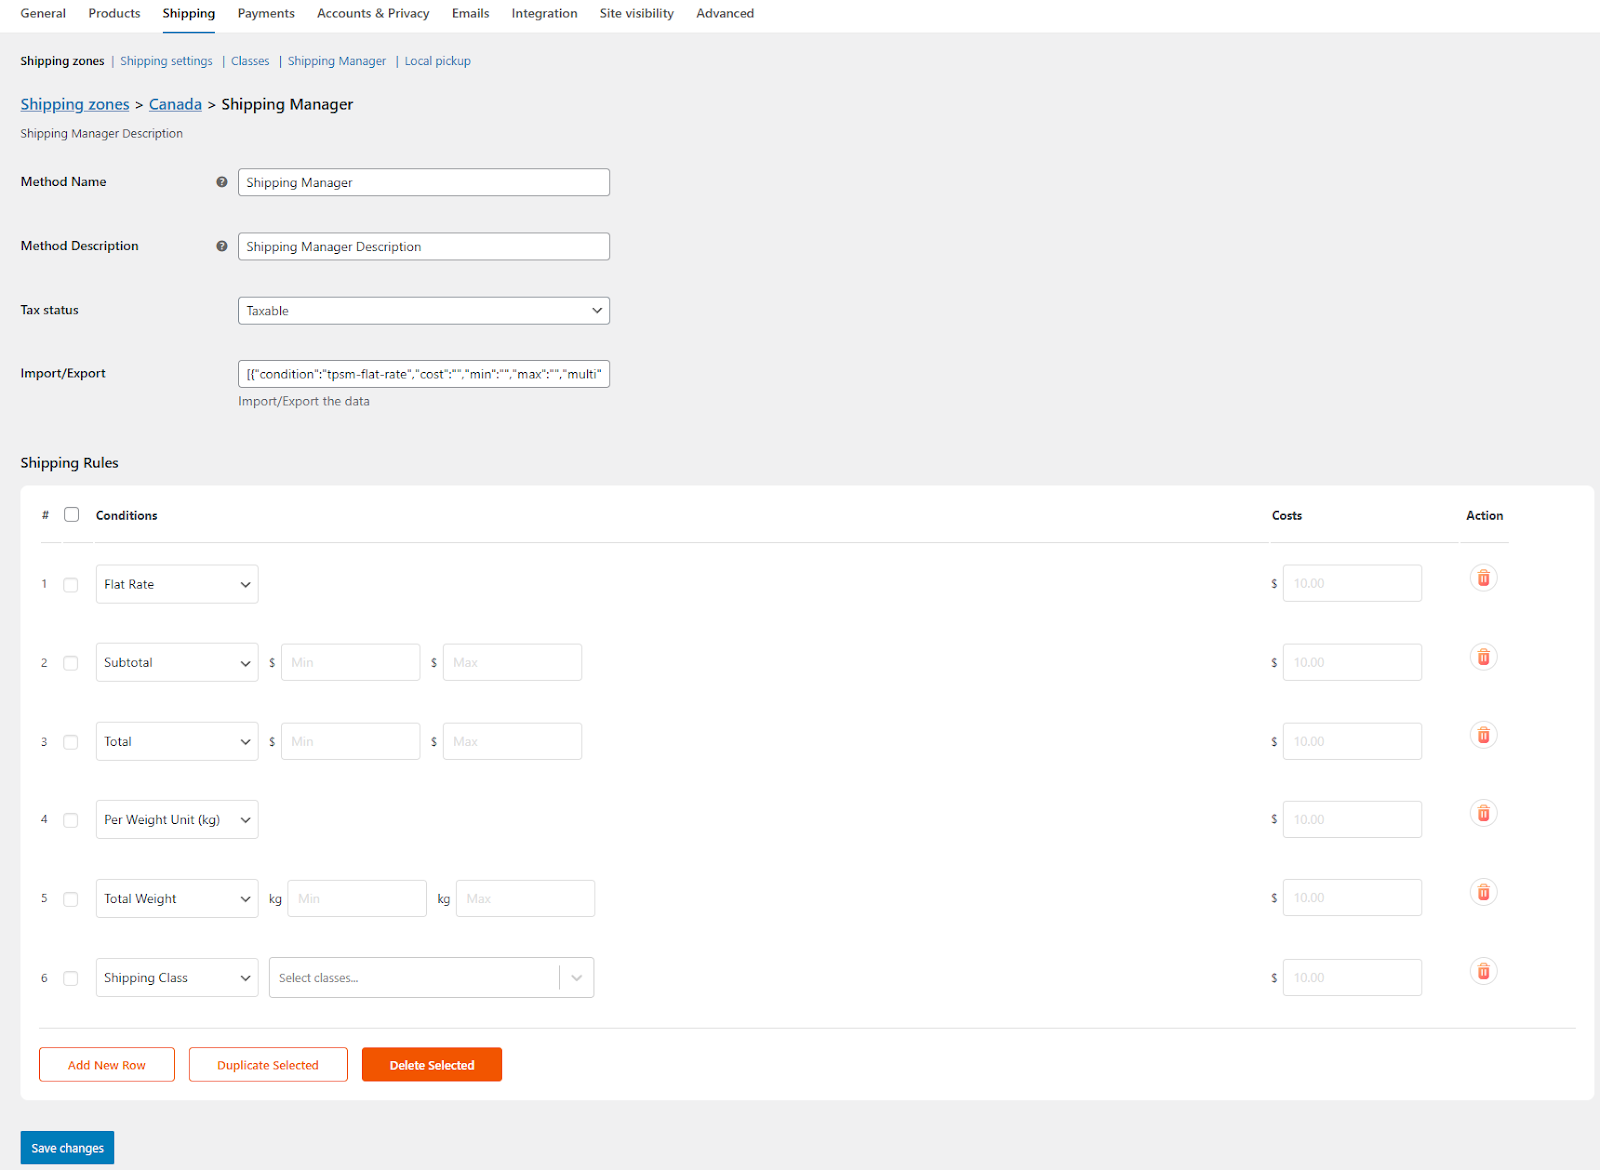
That's all! The Shipping Manager plugin is now ready to use. Here is an overview of the Shipping Manager plugin features available under the WooCommerce > Settings > Shipping.
Note: You need to set up the zone and then edit that zone to get the features of shipping manager. Take a look at our zone creation documentation.
An Experienced Digital Company focusing on building functional, simple, human-centered digital product for future
Services
Additional Resources
theme
paste
Themepaste is a service provided by Byteshake Ltd.