The Limit Login Attempts feature is a smart defense tool designed to shield your WordPress site from brute-force attacks. It monitors repeated failed login attempts and automatically locks out suspicious users or bots trying to guess passwords.
You can configure this feature with maximum precision:
- Max Login Attempts allows you to set the number of incorrect password entries a user is allowed before being locked out.
- Lock For (in minutes) defines how long the user or IP stays blocked after max attempts are reached, whether it’s 15 minutes or several hours.
- Maxed Lockouts allows you to set the number of times a user or IP can be temporarily locked out within a day before they receive a longer ban or require admin intervention.
- Block Message allows you to customize the message displayed to locked-out users, providing clear feedback (or a friendly warning) when access is restricted.
- Block with IP Address allows you to manually enter IP addresses to be permanently blocked from login attempts.
This layered configuration not only deters unwanted login behavior but also gives you the flexibility to fine-tune access control based on your site’s risk level and audience.
Here is how you can use this feature:
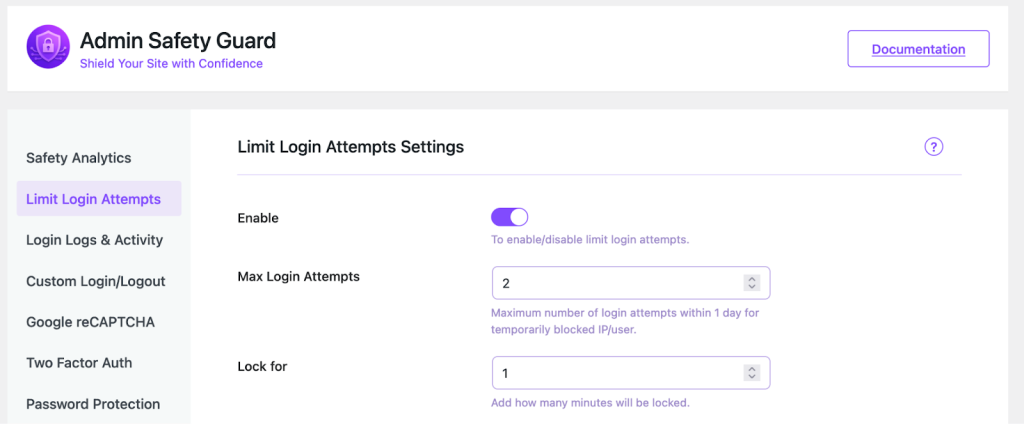
Enable Limit Login Attempts Feature
First of all, you need to turn on the Limit Login Attempts feature so that it works accordingly.
- Enable the feature by tapping the Enable button.
You can now use the feature by configuring the following options.
Max Login Attempts
- Put your preferred number of Max login attempts in the space and click Save Settings.

- Now, navigate to the login area of the website and attempt to log in with incorrect credentials.
Trying this [the number you’ve put] times with wrong credentials will lock you out of the website. Let’s see how you can set the lockout time.
Lock For
- Specify your preferred time to lock a user out of accessing your site for the specified duration.

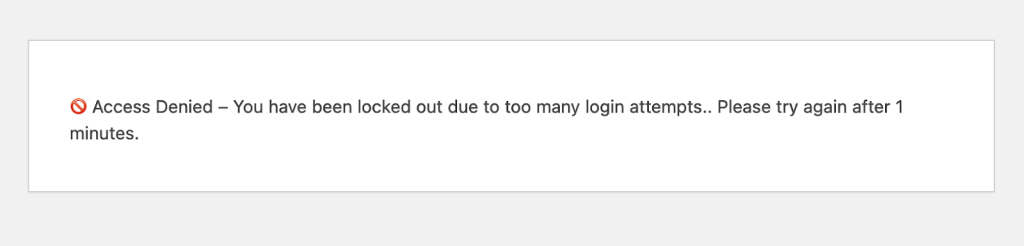
- If you attempt to log in three times (as previously set), you will be locked out of the site for 1 minute.
As you can see, you’ve been blocked from the website for 1 minute. You must now wait 1 minute to re-enter the site using the proper credentials.
Let’s see what happens if you attempt to log in more than 2 times. This brings us to the max lockout option.
Max Lockouts
Previously, you were temporarily locked out of accessing the site due to three incorrect attempts. Now, let’s see when you can block the user from permanently accessing the site.
Set the number of attempts beside Max Lockouts, which indicates the maximum number of attempts the user can make before being blocked. Then click Save Settings.

- Now, if you attempt to log in to the site more than 2 times, you will get blocked from the site.
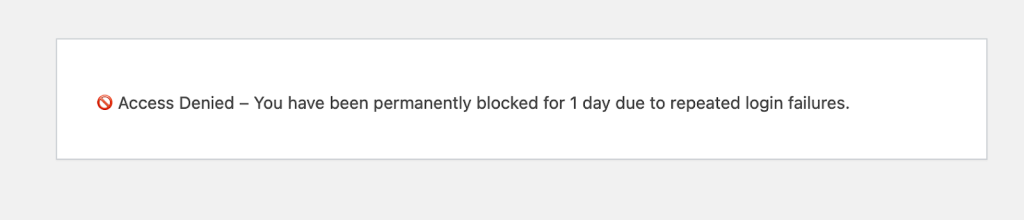
However, the user is blocked from the site for 1day when someone attempts to log in a maximum of 2 times.
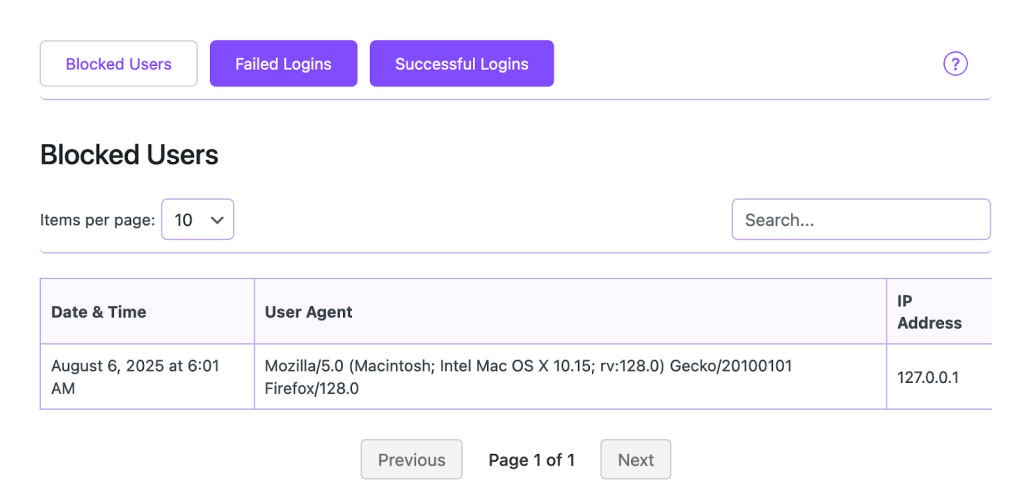
- When someone gets blocked, you’ll get the information in the Login Logs & Activity tab. However, people who are blocked for 1 minute won’t be listed in the tab.
Block Message
You can set the message that you want to show when someone gets blocked from your site.
- Insert the message in the blank space beside ‘Block Message’. Then, click Save Settings and check the message.
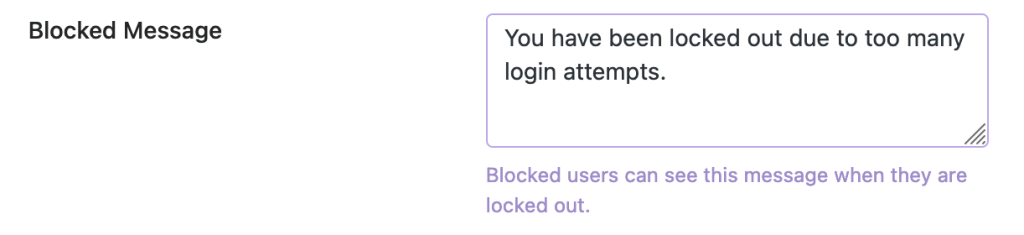
- After 2 consecutive failed login attempts, you will see the blocked message.
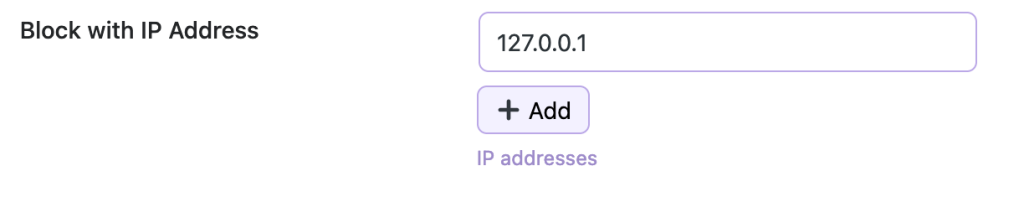
Block With IP Address
Admin safety guard also allows you to block a user based on their IP address.
- Put the IP of a user beside the Block with the IP address box. Then click the Save Settings button.
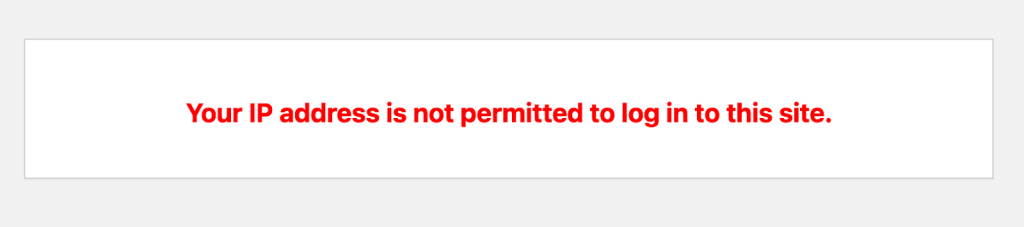
- If you attempt to log in from that blocked IP address, you will be unable to access the site.
- You can enter multiple IP addresses.