Shipping Class-based Shipping Fee
Shipping Class in WooCommerce lets you group products with similar shipping characteristics and assign different shipping rates to each group.
For example, you might create a “Fragile Items” class with a higher flat rate to account for extra packaging, and a “Lightweight Goods” class with a lower cost.
If a customer buys one item from each class, WooCommerce can apply the appropriate rate for each, ensuring both cost-efficiency and proper handling.
This is especially helpful for stores selling a mix of product types that need different shipping strategies.
Shipping class-based Shipping in Shipping Manager
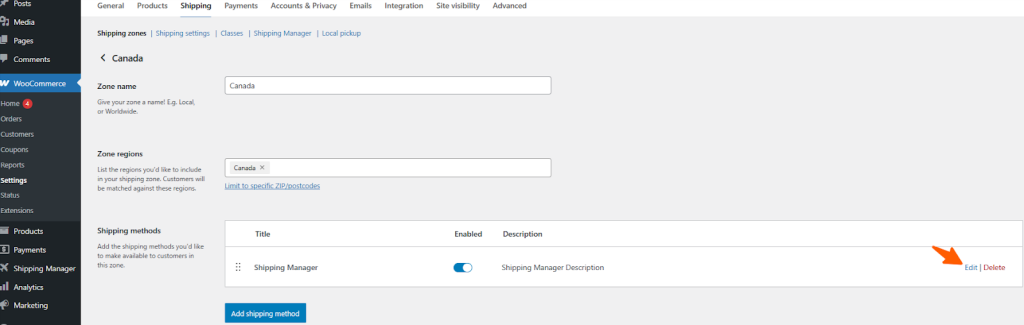
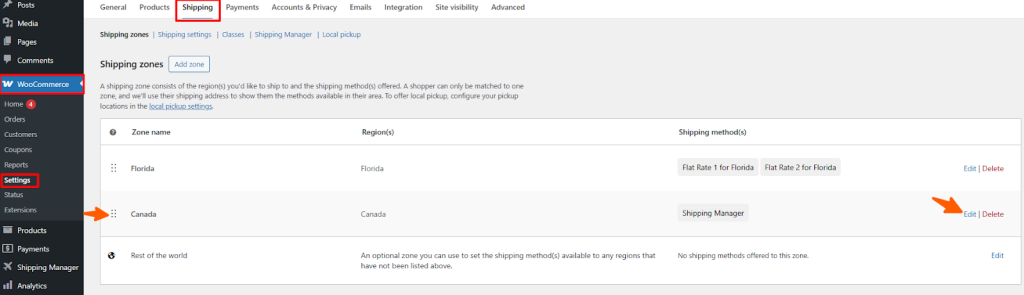
First, navigate to WooCommerce > Settings and then click Shipping. Now, you can see that two zones have been created already. Click Edit to customize the shipping rules of that zone and apply a shipping fee based on the Shipping Class.

In the next section, you will see the available shipping methods. You can also create a new shipping method by clicking the Add Shipping Method button. Now, click the Edit button to add or customize the shipping rules.
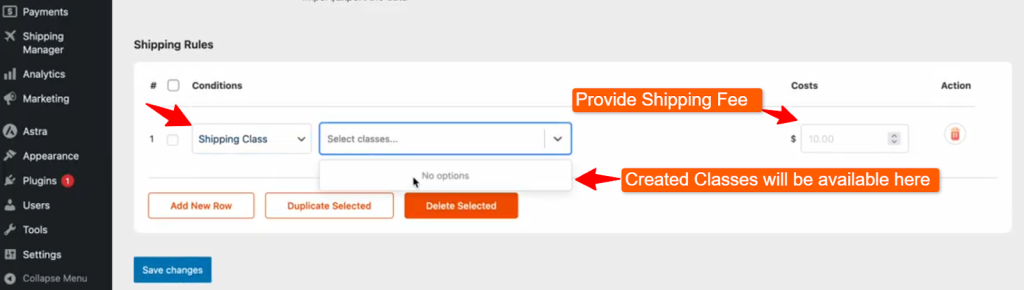
Now, you can view the shipping rules available on the list and select Shipping Class from the list.
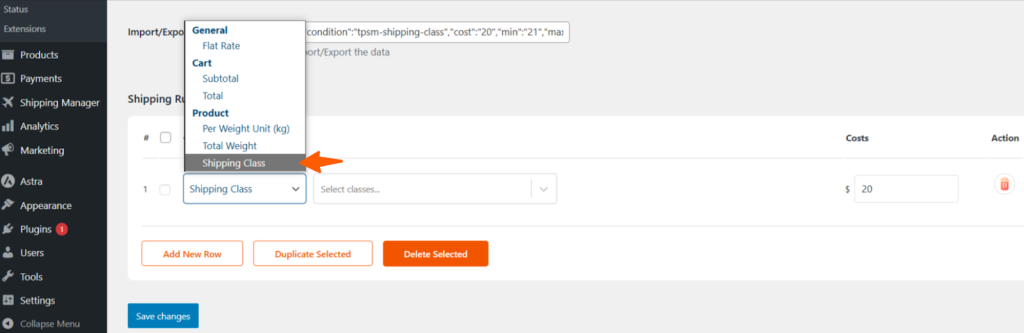
When you select Shipping Class, you need to create classes from WooCommerce.
Now, let’s create classes in WooCommerce by navigating to WooCommerce > Settings > Shipping and then click Classes. Then click Add shipping class button..
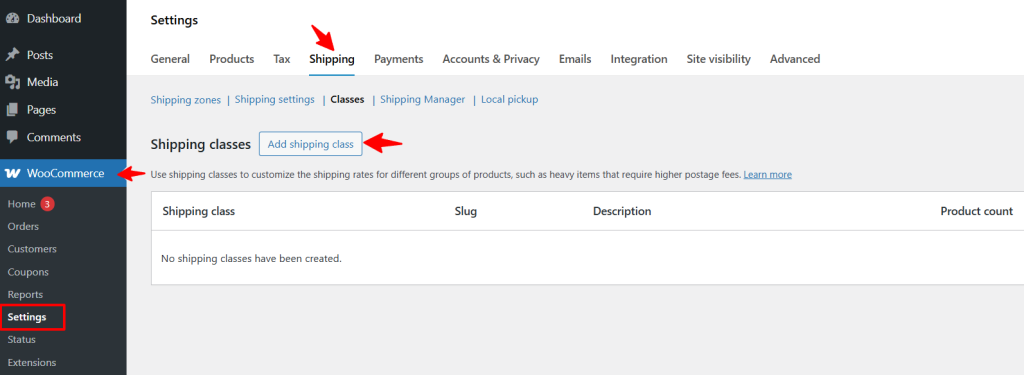
Now provide the Shipping Class name, Slug, and Description of the class. Then click the Create button. So, one product can have two different variations when it comes to weight, color, and other categories.

Similarly, create another class for your products using the same steps as earlier.
.
Now go back to WooCommerce > Settings and click Shipping.
Then click the edit button to view the shipping class that you’ve set from the available shipping rules.

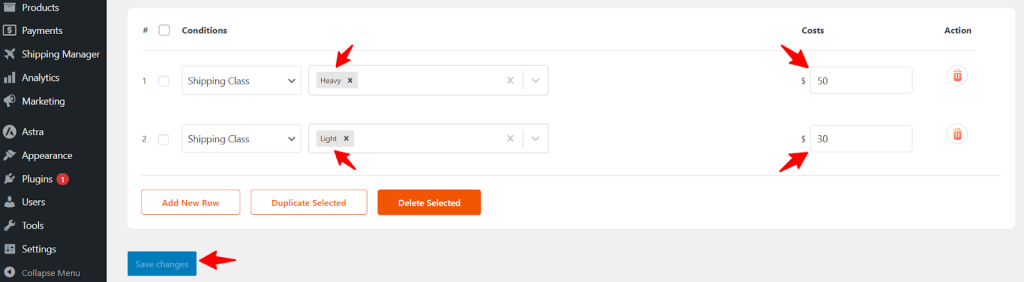
As you can see, we’ve selected two different versions of the classes from the Shipping Class. The first class is Heavy, for which the shipping fee is $50, and the second class is Light, for which the shipping fee is $30.
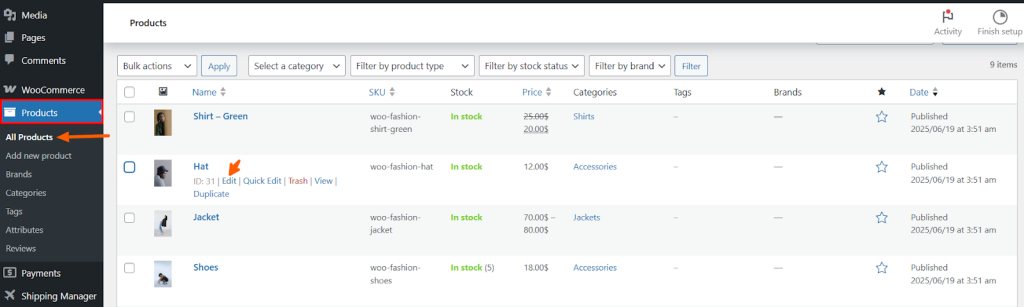
The products in your shop must have a class since we’ve selected class-based shipping. Now, go to Products > All Products and click Edit to set a class for your product.

Scroll down a bit and click Shipping, and set the Shipping class for the product. Click Update to apply the changes.

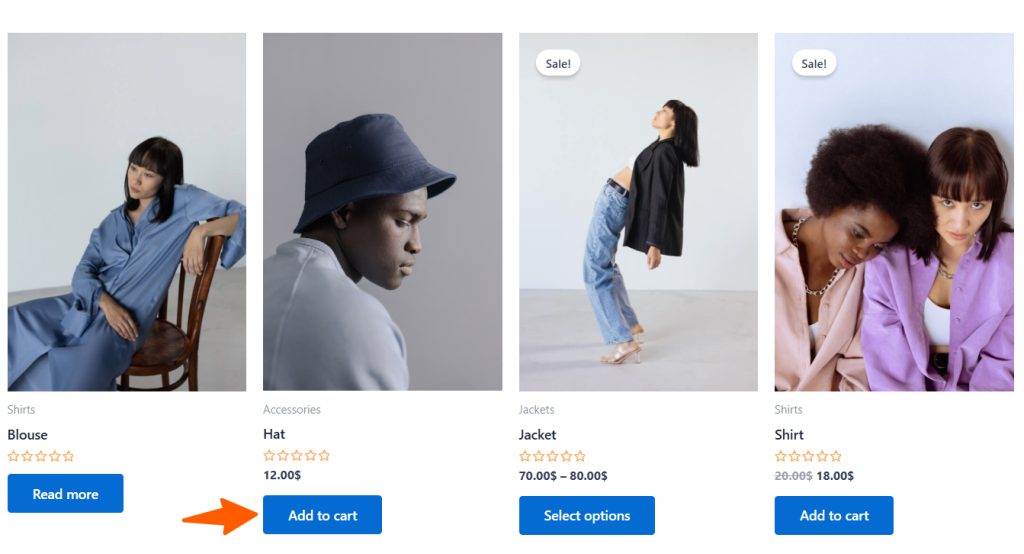
Now go to your shop, select your preferred product, and click the Add to Cart button.
Then go to the checkout page of your shop.

Since this product is a heavyweight product, the shipping cost is now$50.
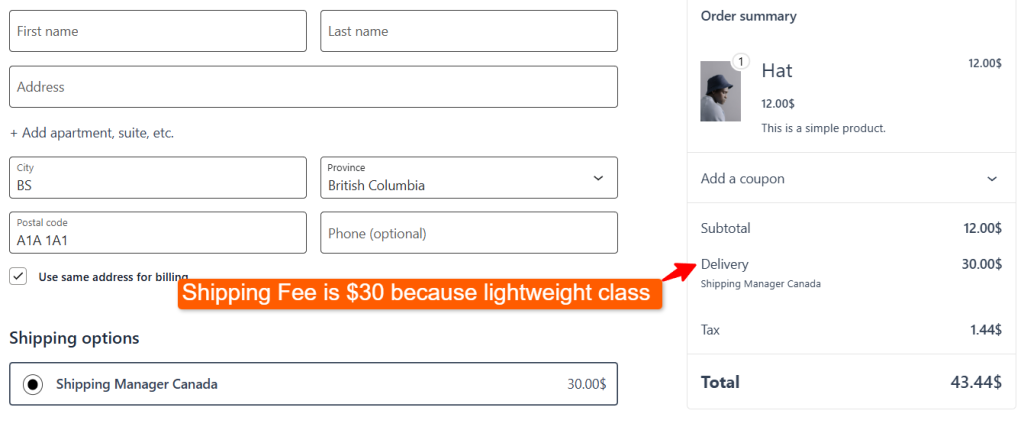
Now, let’s change the product’s shipping class to lightweight. Then update the product.

Now go to the checkout page and refresh it to see the changes in the shipping fee.
Creating Variable Products and Different Classes at The Same Time
Selecting the class by editing a product is not logical because one product can have multiple classes and related attributes. This resolves the manual intervention and allows users to select their preferred product variant from the product page.
Let’s explore how you can set attributes and offer different class options to the cart page:
Go to Products > All Products and click Edit to set a class for your product.
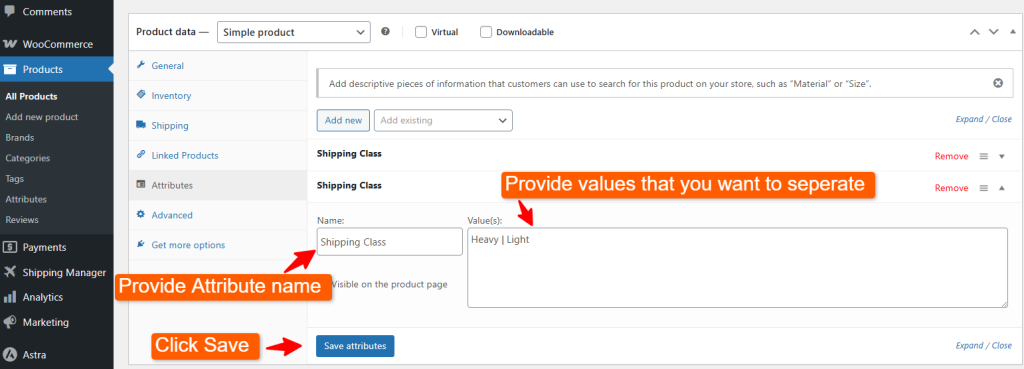
Scroll down a bit and click Attributes. Then click on the Add New button.

Now, provide the attribute name and the value names that you want to separate or create options for.
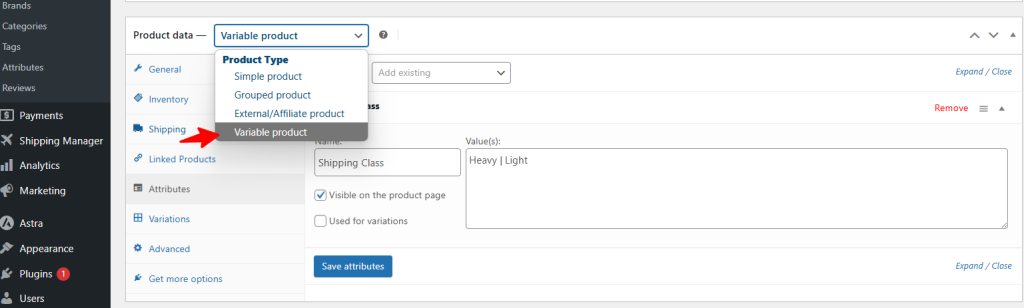
Now, you need to make this product a variable product. Simply select Variable product from the Product data.
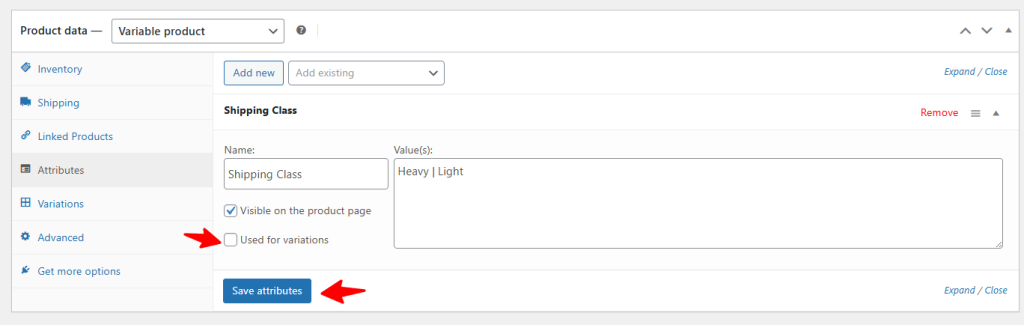
Now go back to the Attributes tab and select your created attribute. Then place a tick mark on Used for variation and click the Save attributes button.
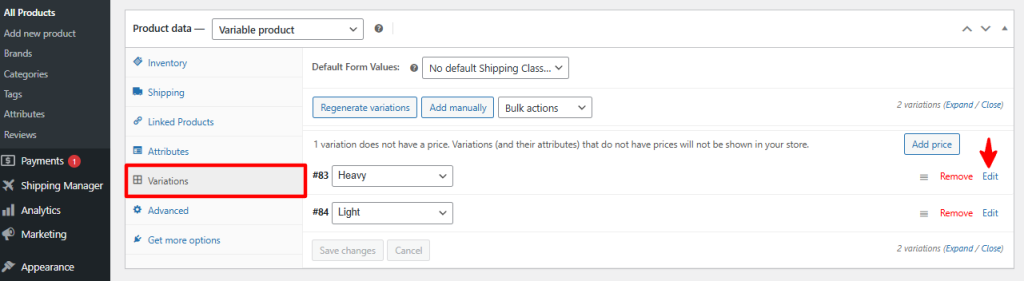
Now go to the Variations tab and click Generate Variations to create variations from the attributes.

As you can see, now there are two product variations named Heavy and Light. Click edit to insert the necessary data on the product variations.
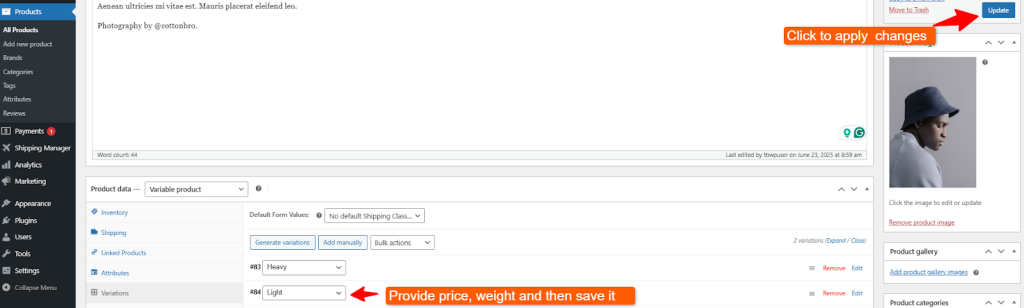
Now enter the information required in the variation, such as price, weight value, and then click the Save Changes button.

Similarly, insert information in another variant named Light and then click on Update.
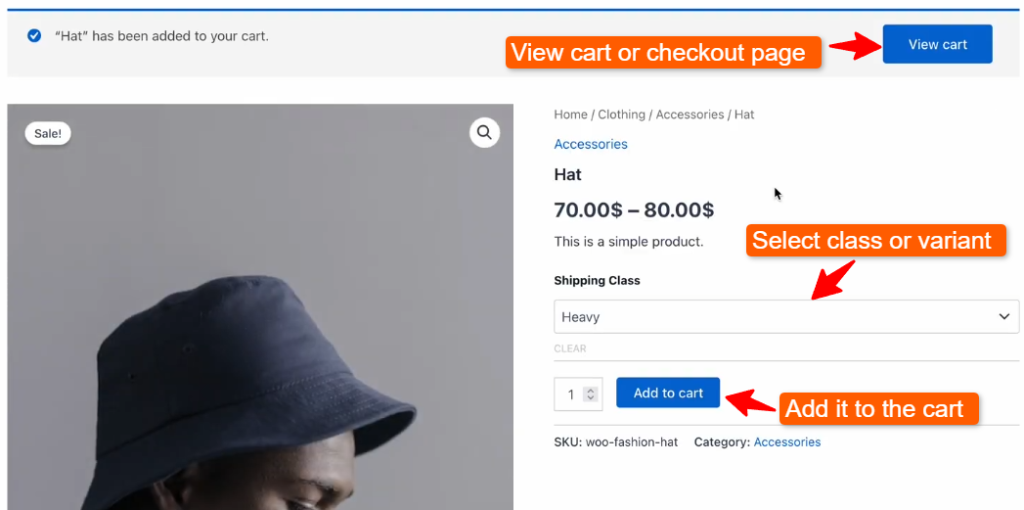
Now go to your shop, select your preferred product, and click the Add to Cart button.

As you can see, there are two variants which you can select from the Shipping class. Click the Add to cart button and then click View Cart or go to the Checkout page.
So, the shipping fee is $50 which we’ve set in shipping manger rules previously.
